Scaling with Alibaba
In this document, we’re going to explain how to setup a Scalable Ant Media Server Cluster in Alibaba.
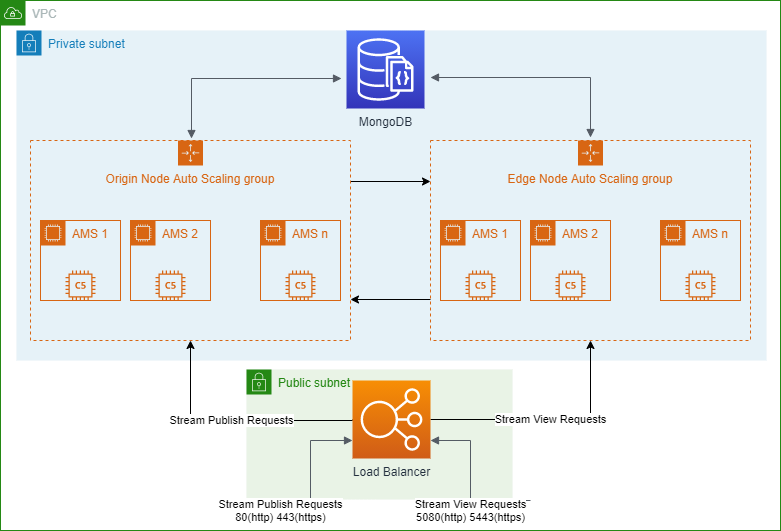
Here below is the diagram about how Ant Media Server is architecturized within Alibaba.
Lets start with brief definitions
- MongoDB Database Server: Ant Media Server uses MongoDB in clustering. Streams information are saved to MongoDB so that edge instances can learn any stream’s origin node.
- Load Balancer: LB is the entrance point for the publishers and players. Load Balancer accepts the requests from publishers or players and forwards the requests to the available node in the cluster.
- Origin Auto-Scalable Group: Nodes(Instances) in the origin group accepts the publish requests and ingest the incoming WebRTC stream. When an origin instance accepts a WebRTC stream, it saves the related information to the MongoDB Database Server. There may be one node or multiple node in origin group. It may even be manually or auto scalable. In our deployment, it’s auto-scalable in Alibaba.
- Edge Auto-Scalable Group: Node(Instances) in the edge group accepts the play requests. Then it learns from MongoDB which origin node has the related stream. After that it gets the stream from related origin node and sends the stream to the player.
Then continue with installing MongoDB Server
The procedure below shows how to start an instance in Alibaba Elastic Compute Service as well. In other words, if you have no experience with Alibaba, you can even install MongoDB Server as follows. If you know how to start an instance in Alibaba, just skip to “Install MongoDB to Your Instance”
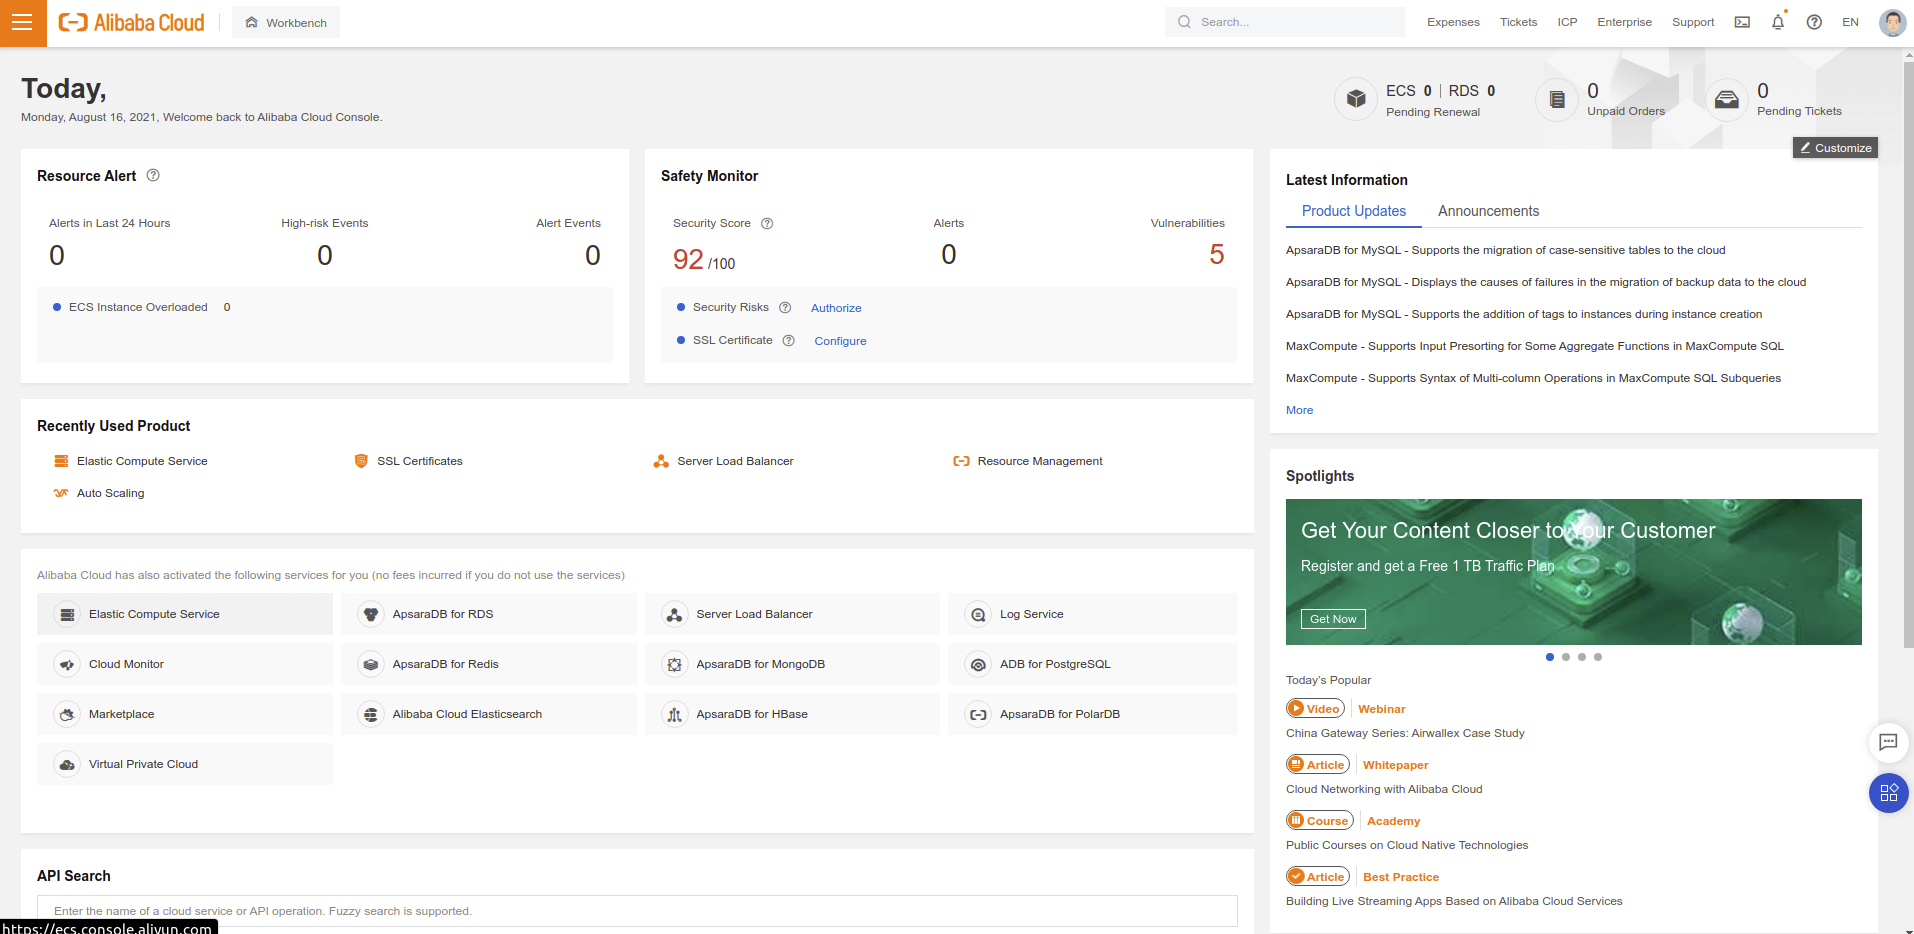
- Signup to Alibaba Cloud if you don’t have an account yet. Login to Alibaba Cloud Console. Then click Elastic Compute Service as shown in the image below.
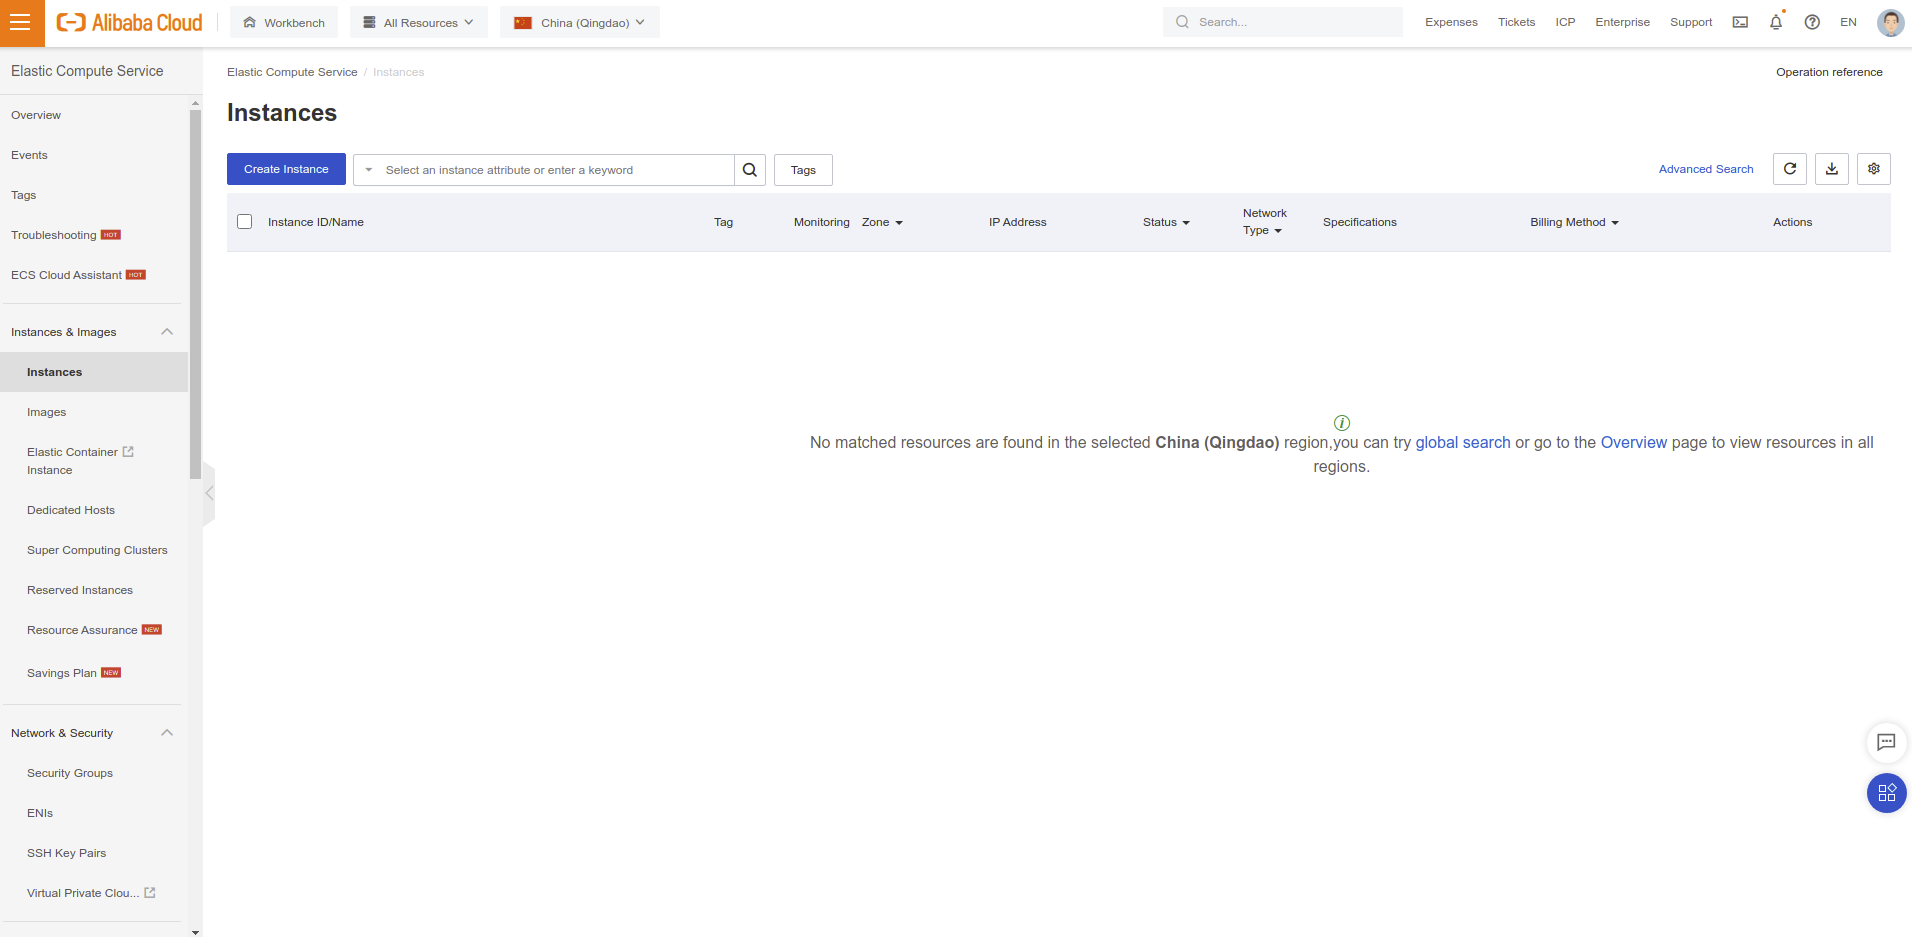
- Click “Create Instance”.
- Select Billing model and Instance type according to your use case.
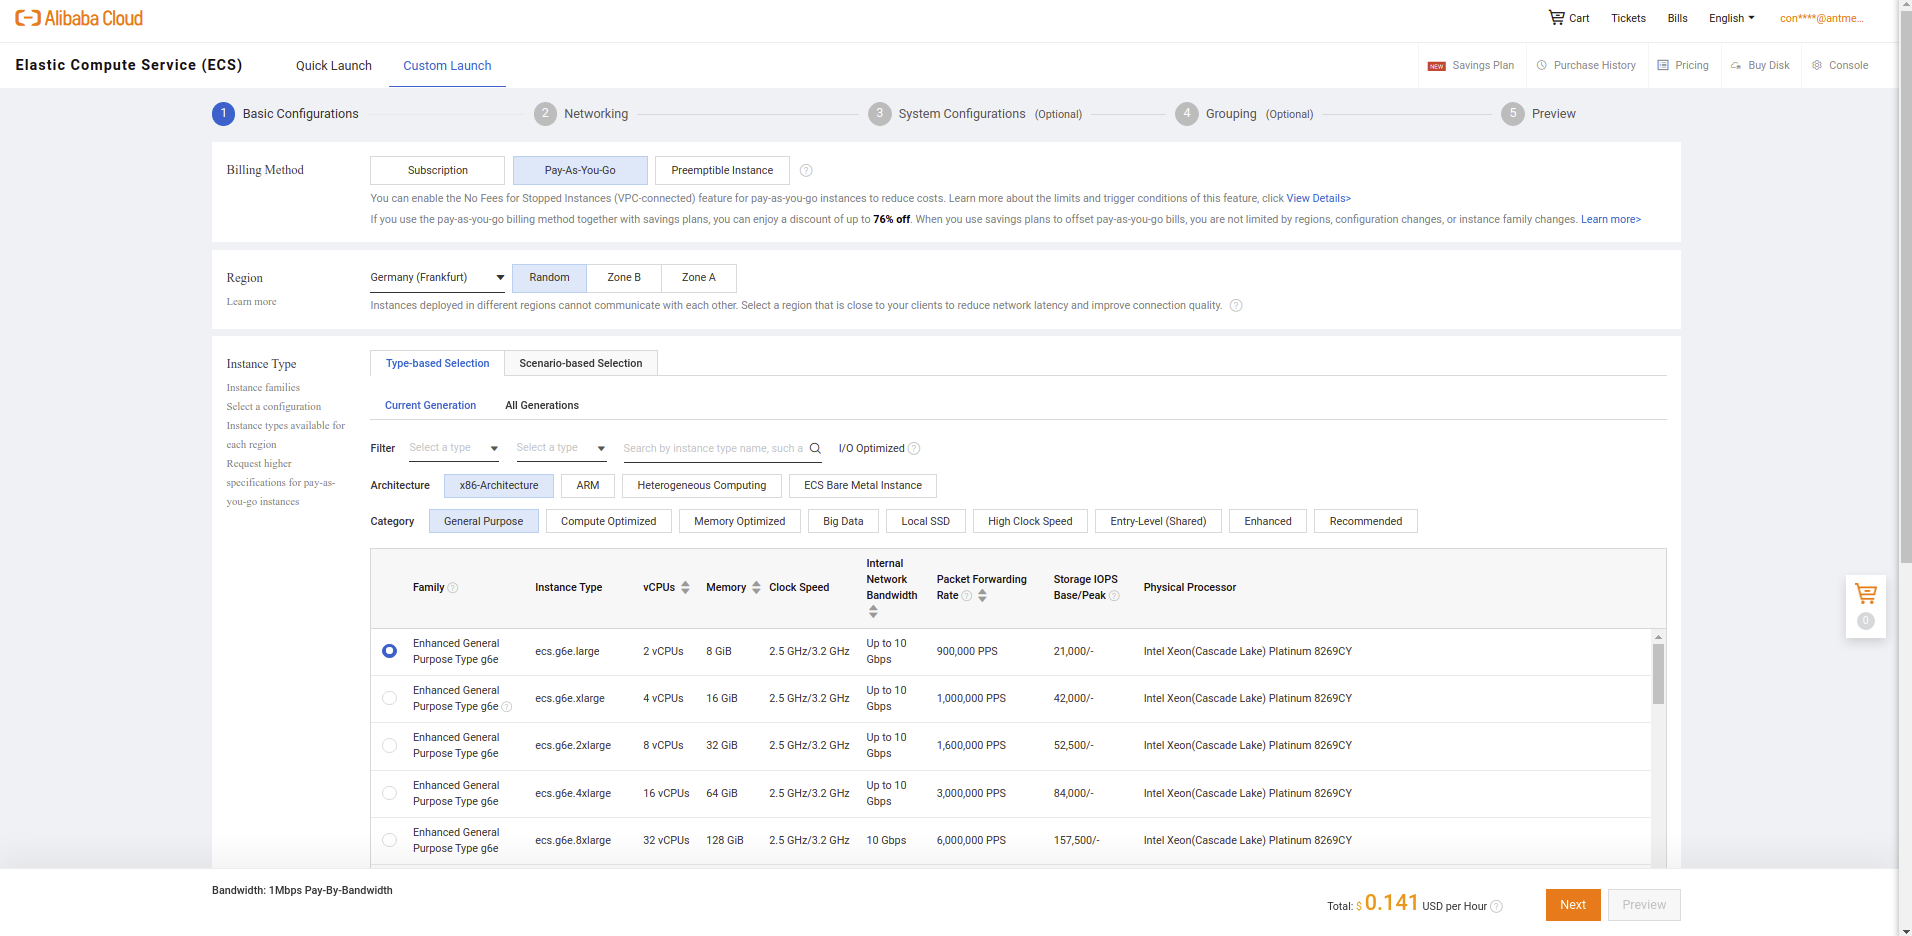
- Choose Instance Type like Enhanced General Purpose Type g6e series.
- You may optionally choose a bigger instance according to your streaming load.
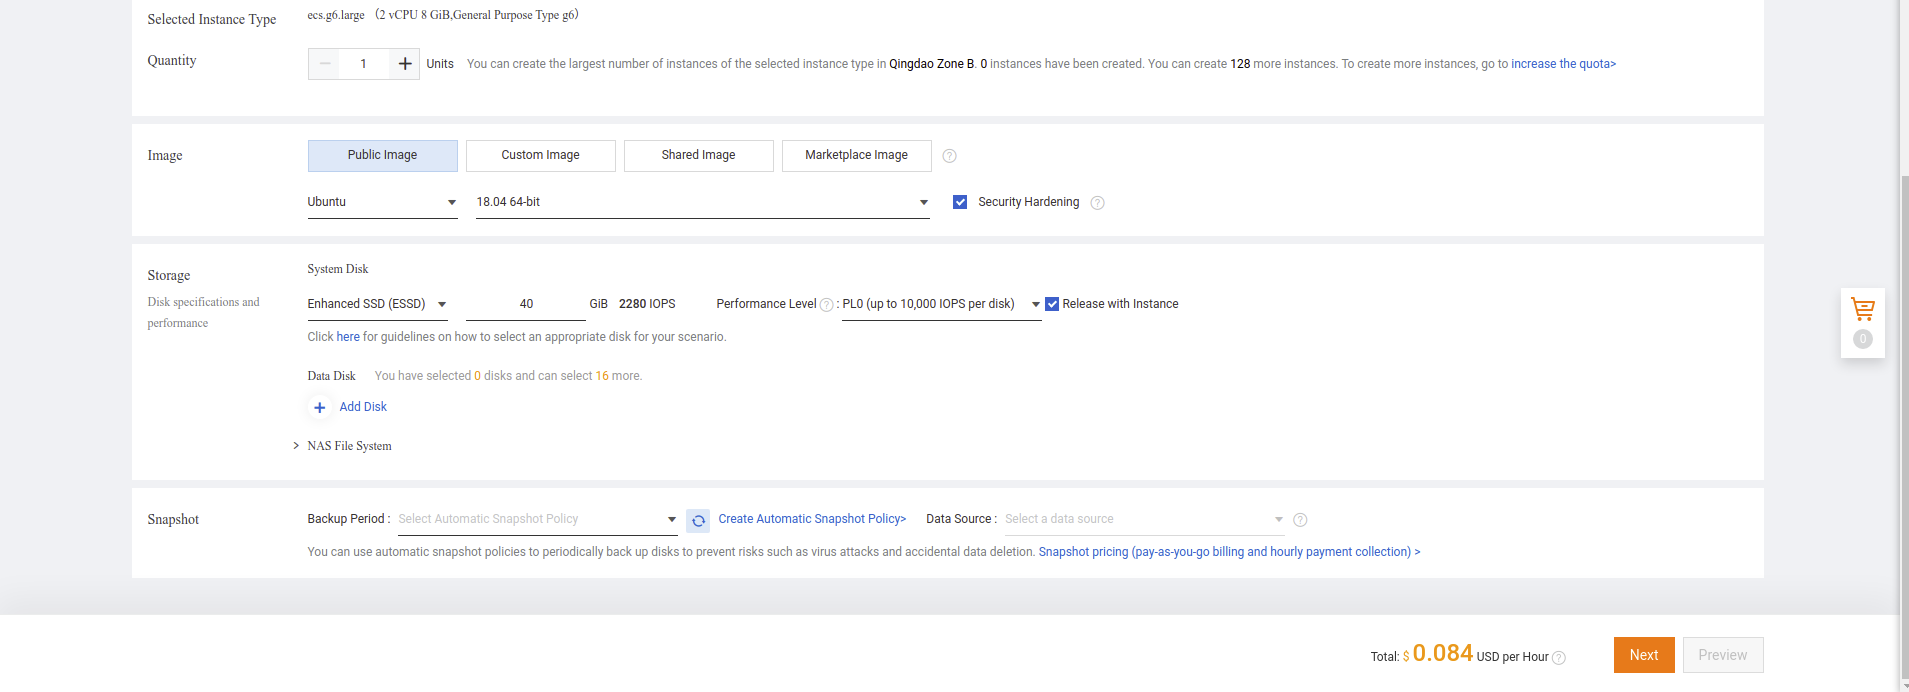
Search for “Ubuntu” and Select “Ubuntu 18.04” and Click Next button
- Create a VPC and security group for your structure
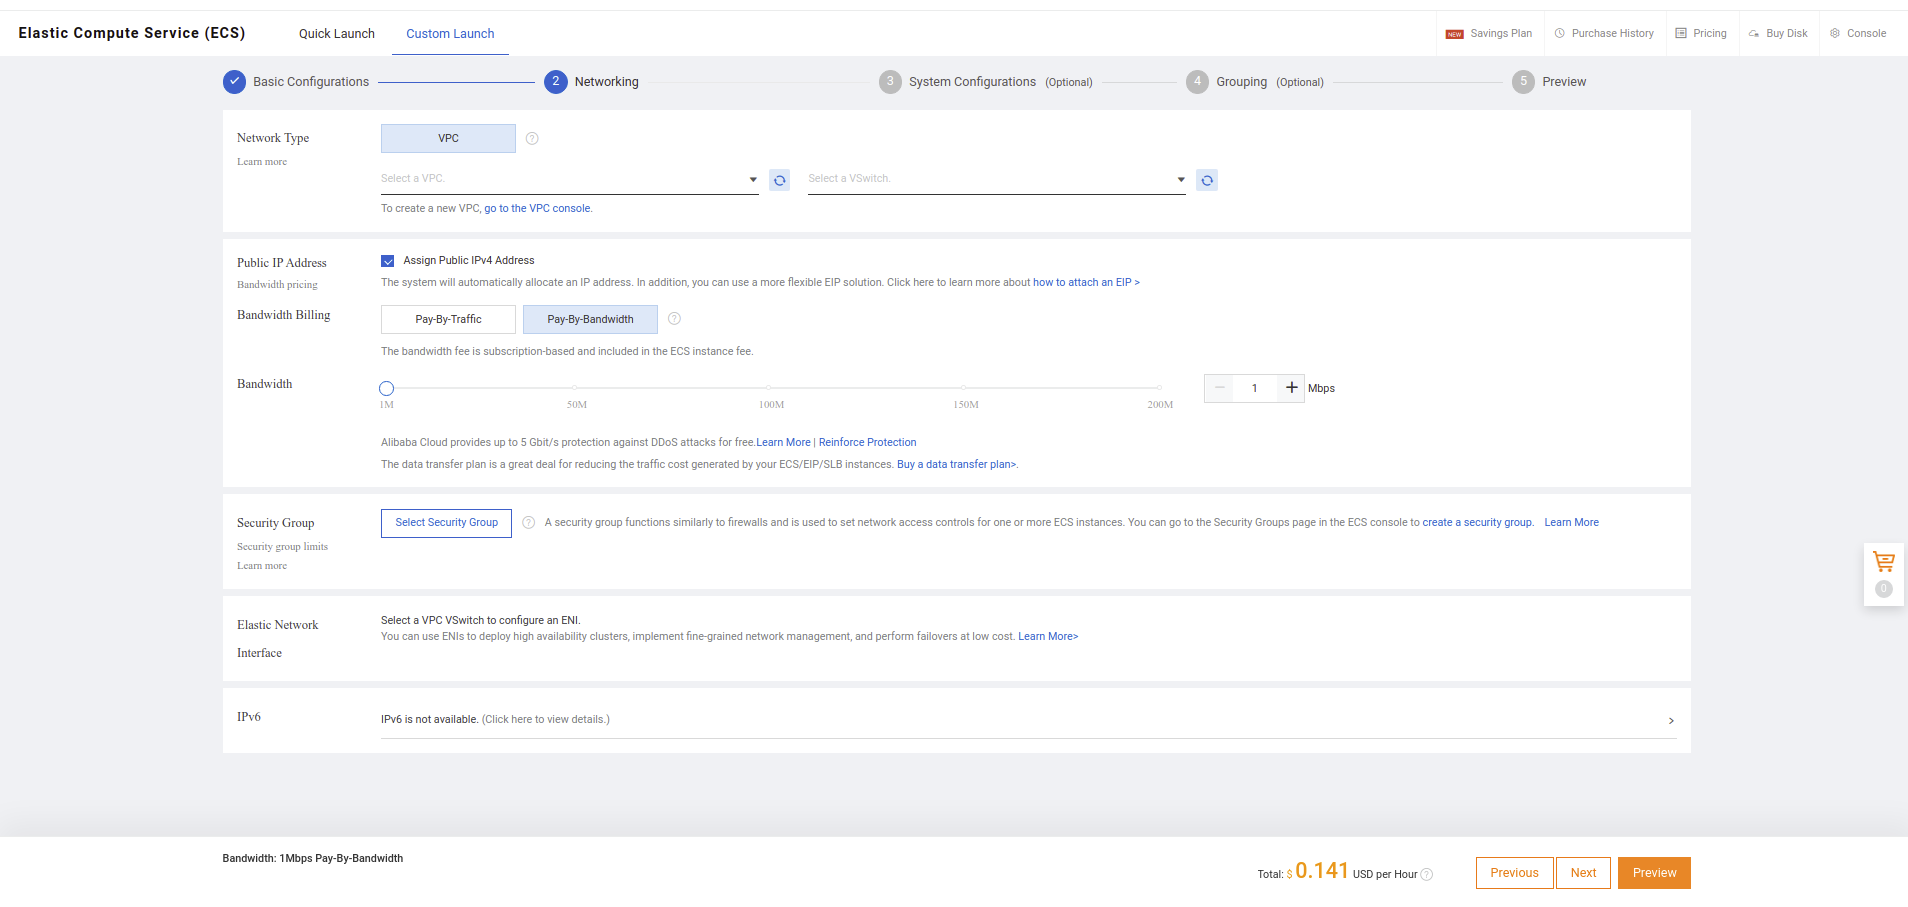
You need to have VPC and security groups for creating MongoDB instance. If you already have VPC and security group options, you can skip Create VPC and Create Security Group parts.
- Go to Elastic Compute Service / Network & Security / Virtual Private Cloud section and click Create VPC button.
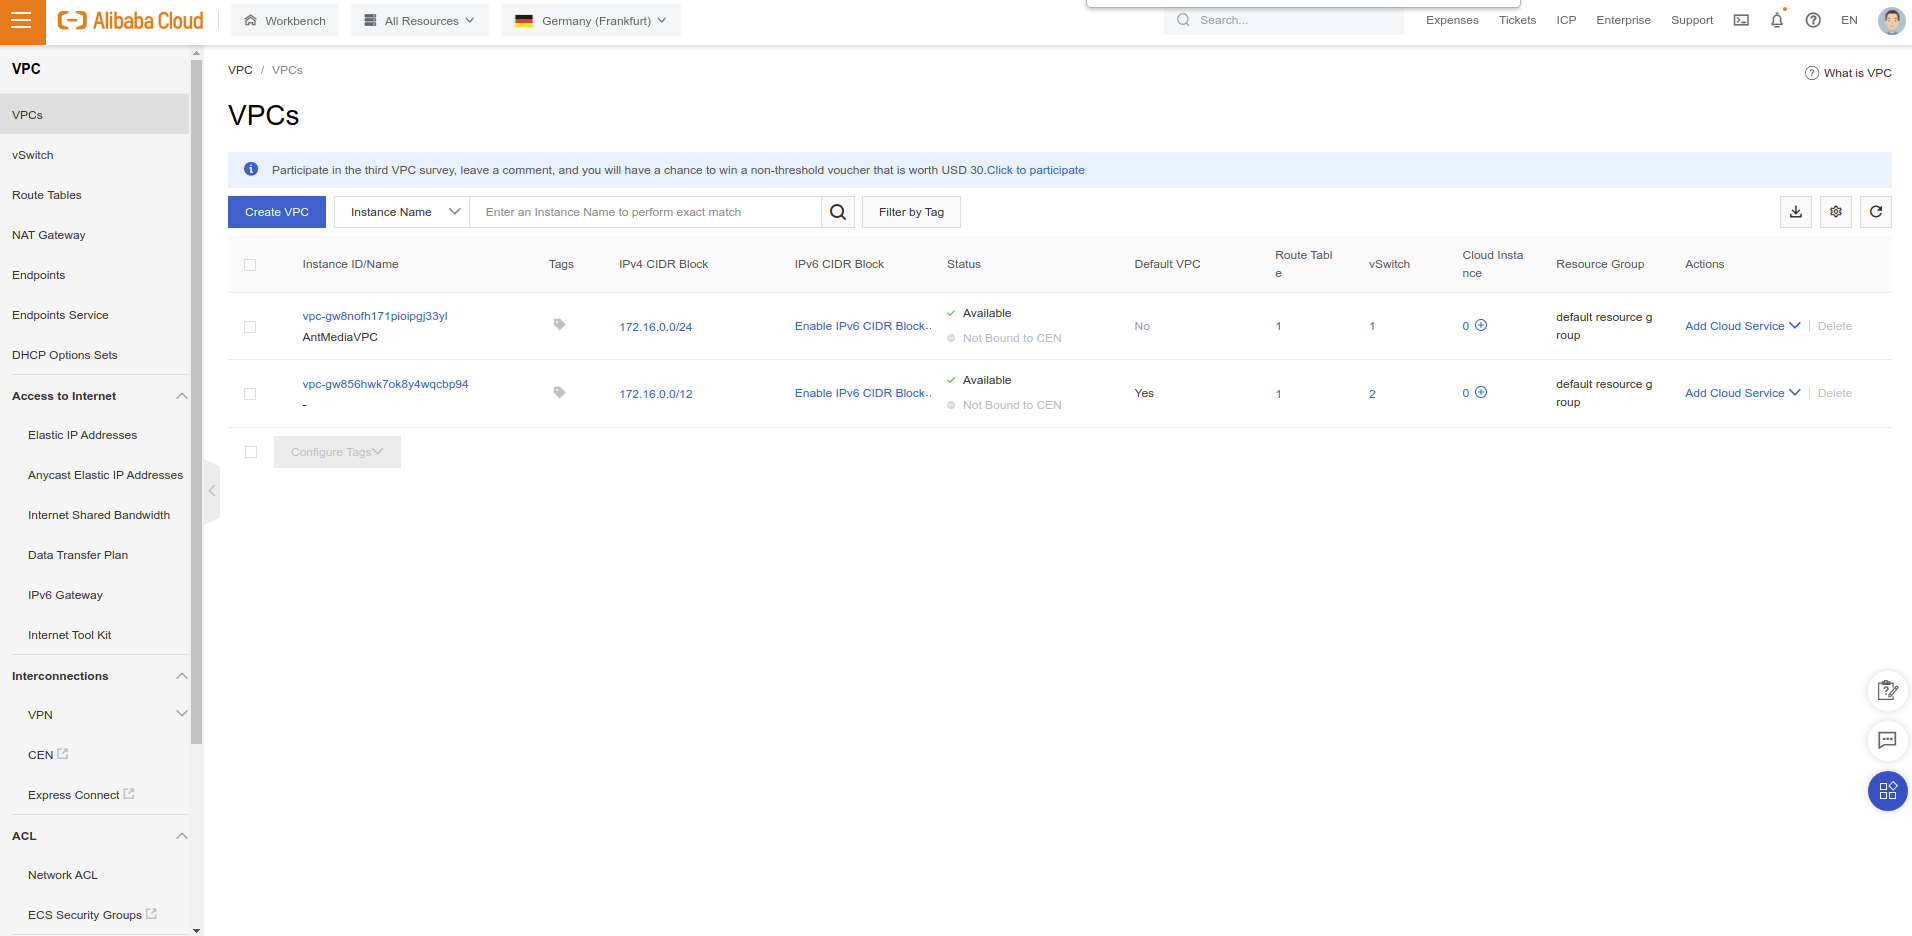
- Fill
NameandIPv4 CIDR Blockparameters according to your use case.
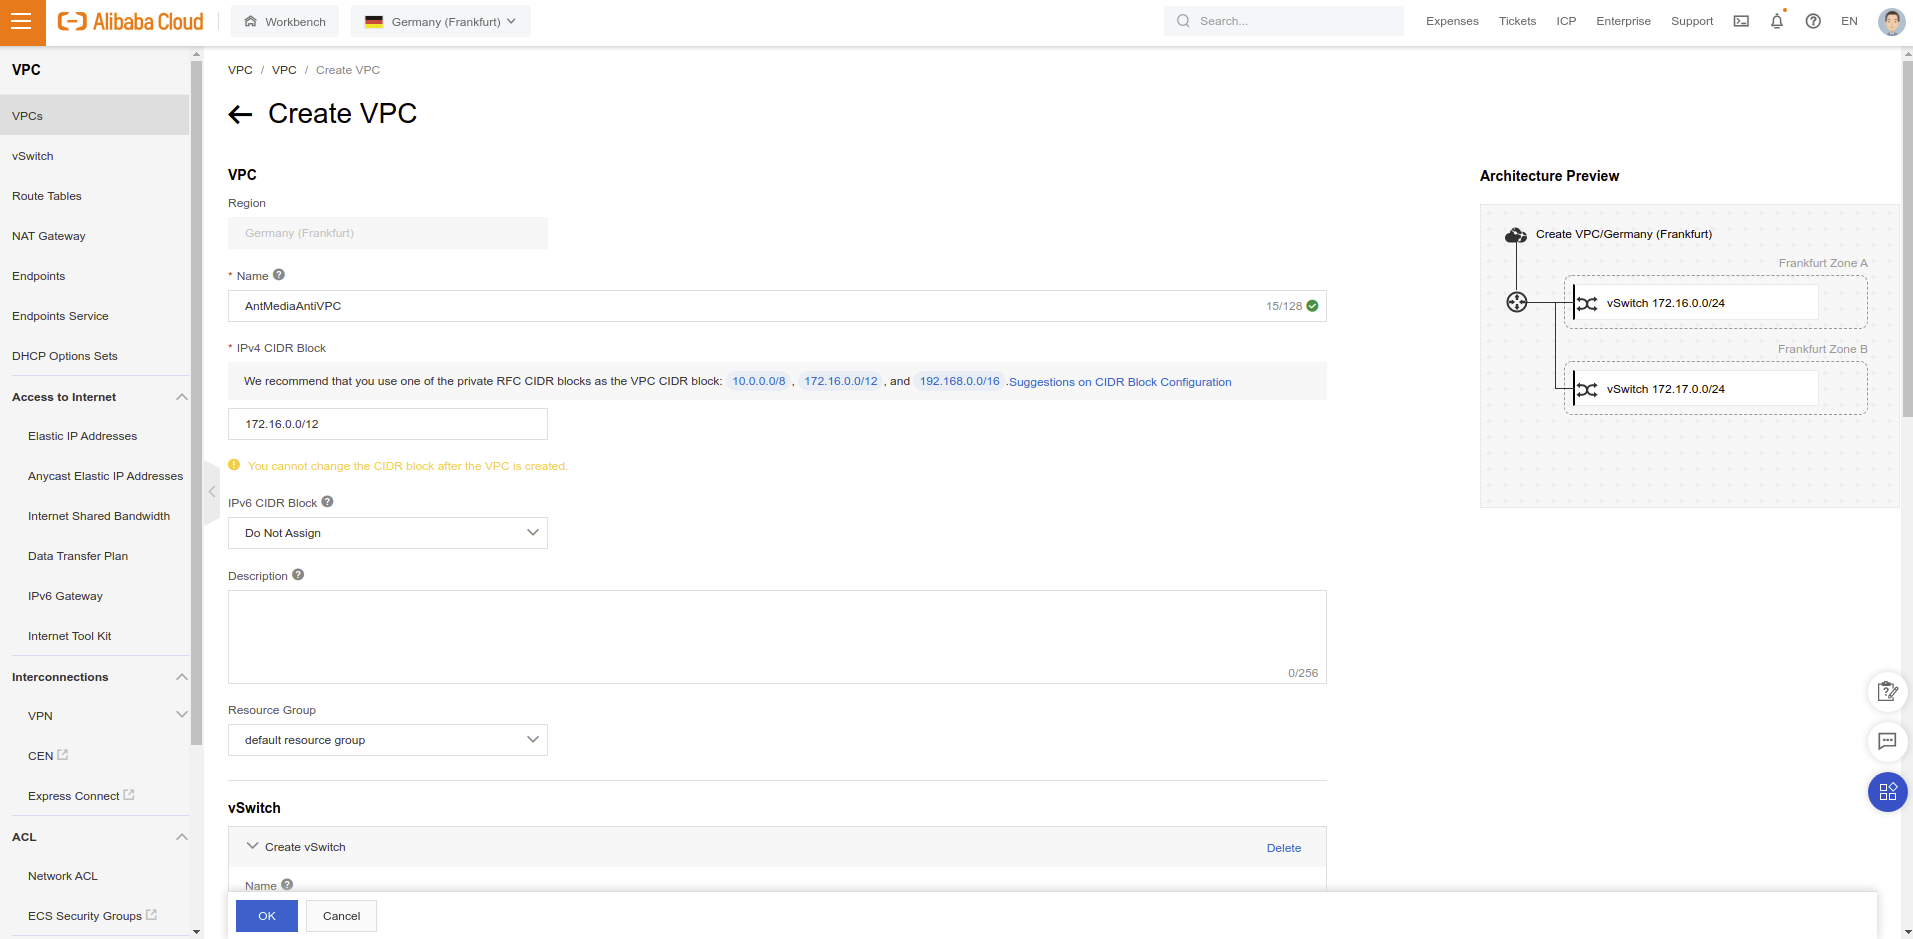
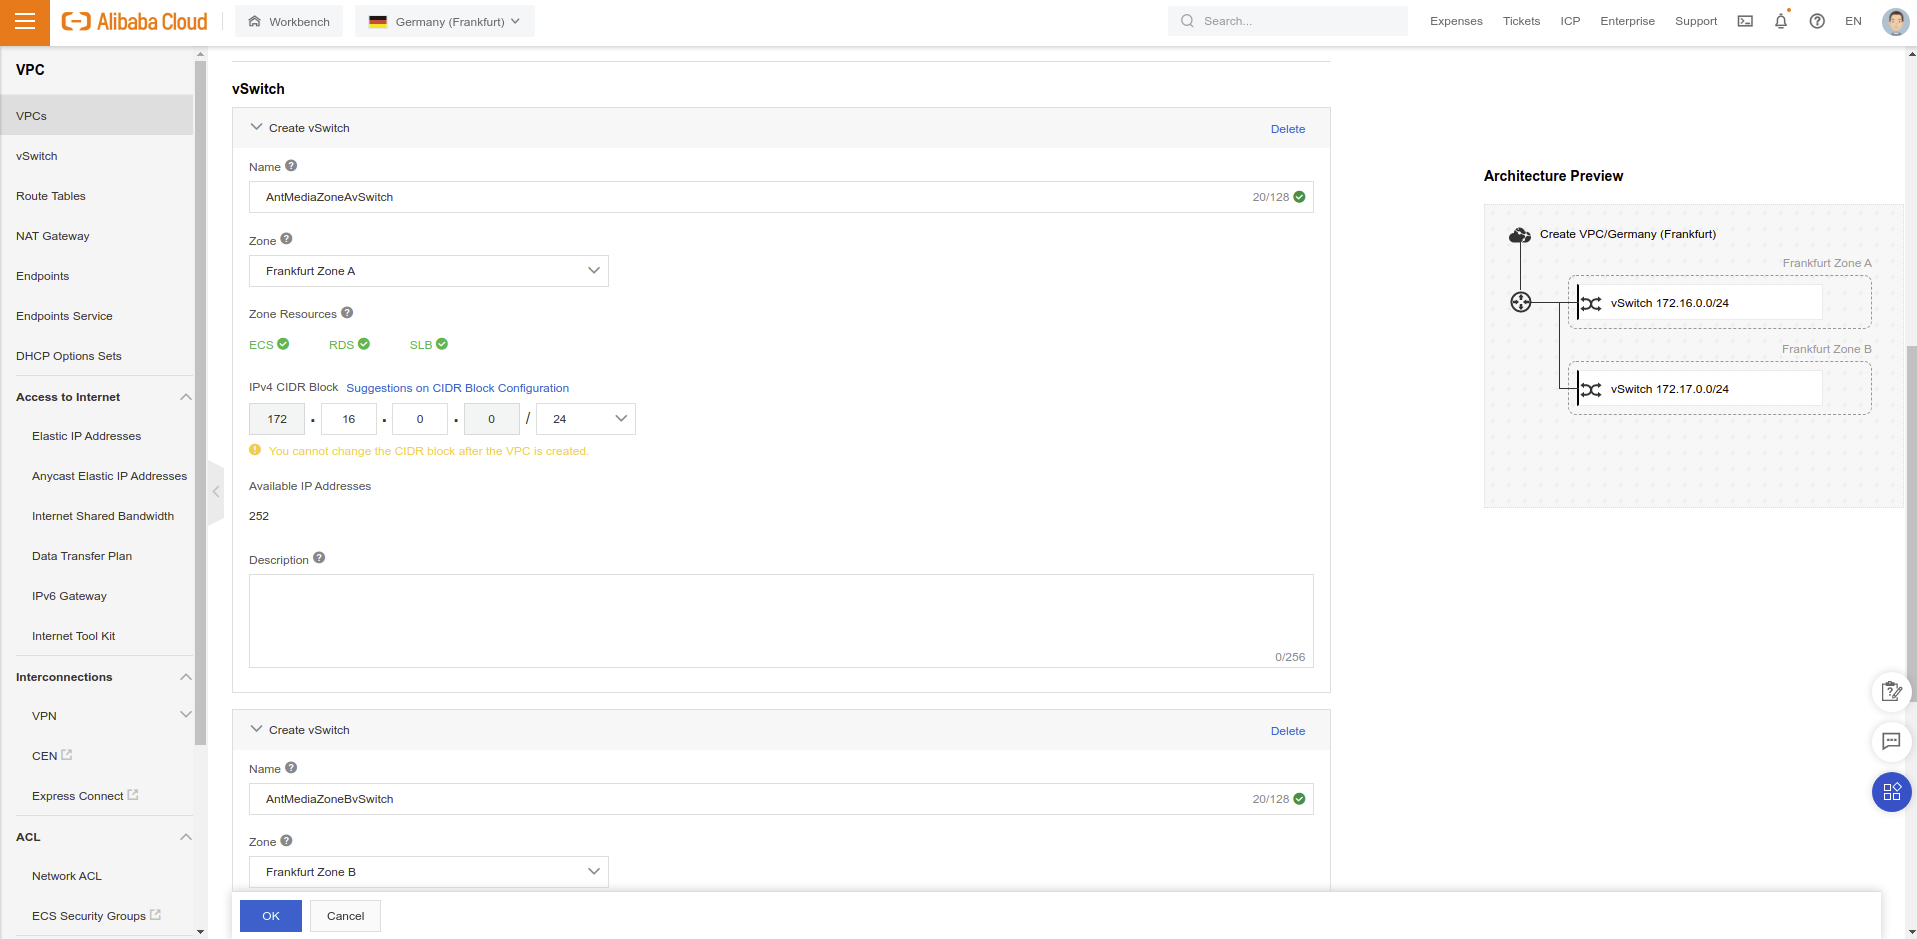
- You need to have 2 vSwitch for autoscaling mechanism. Fill vSwitch
Name,ZoneandIPv4 CIDR Blockparameters.
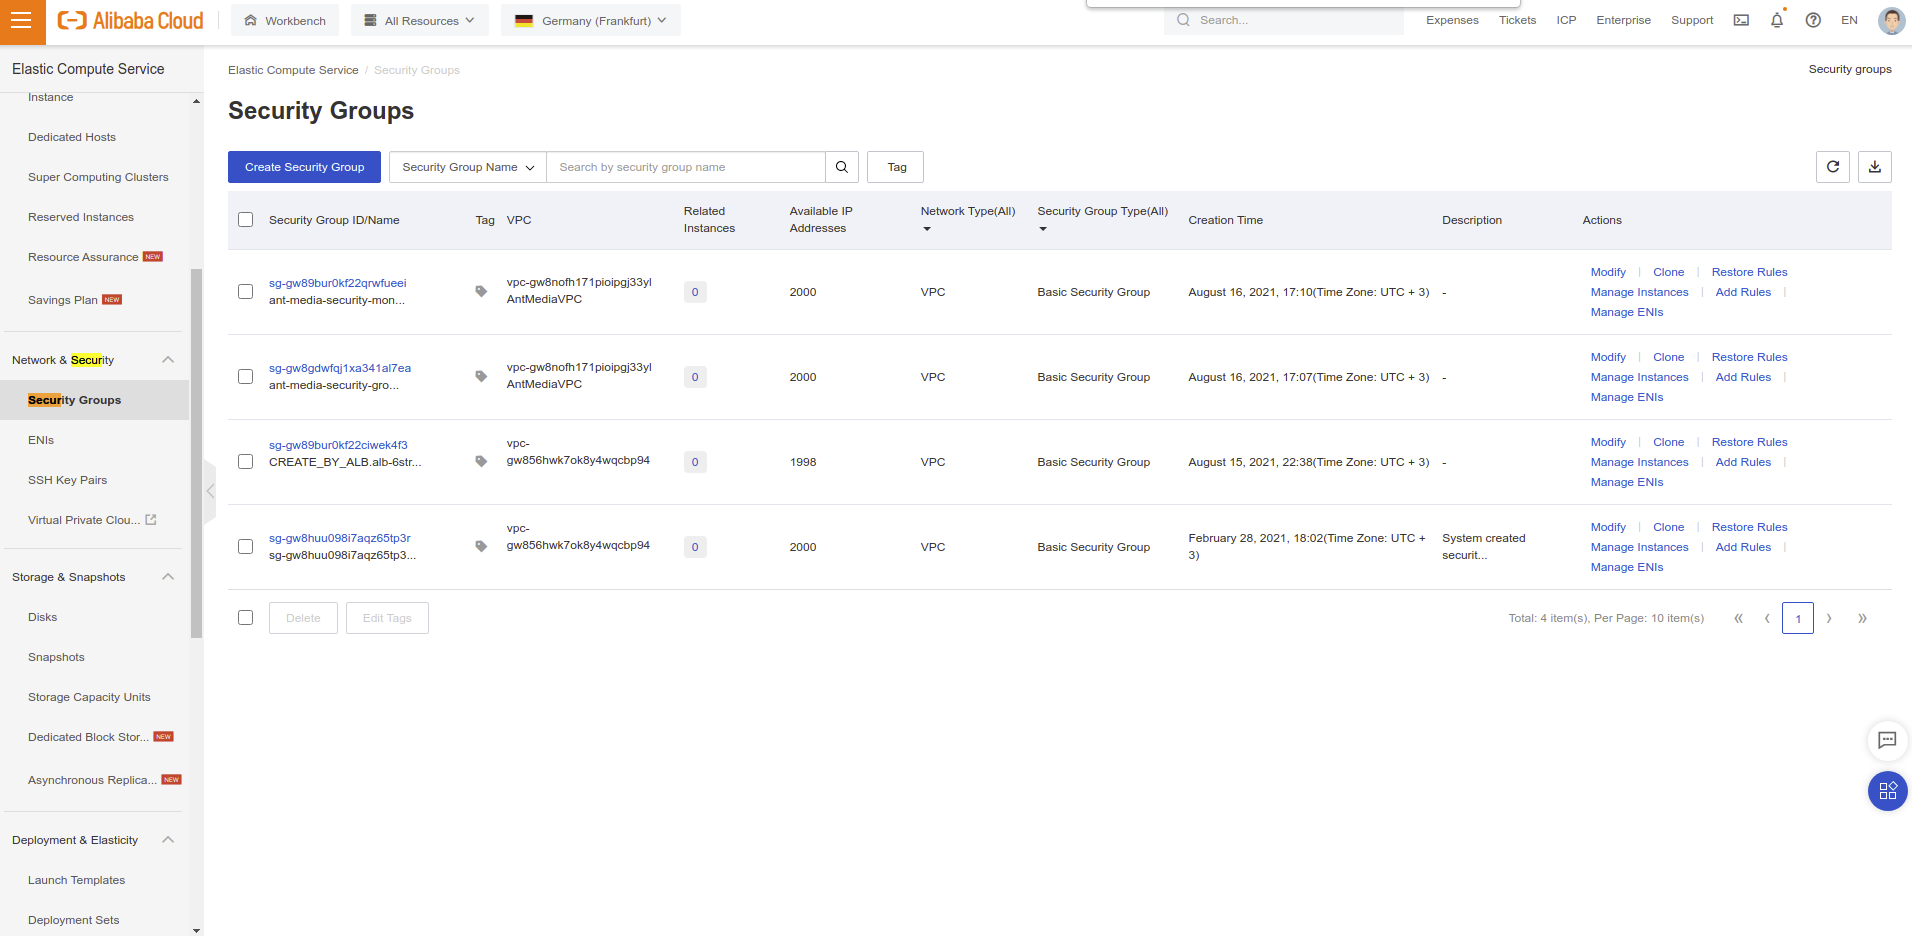
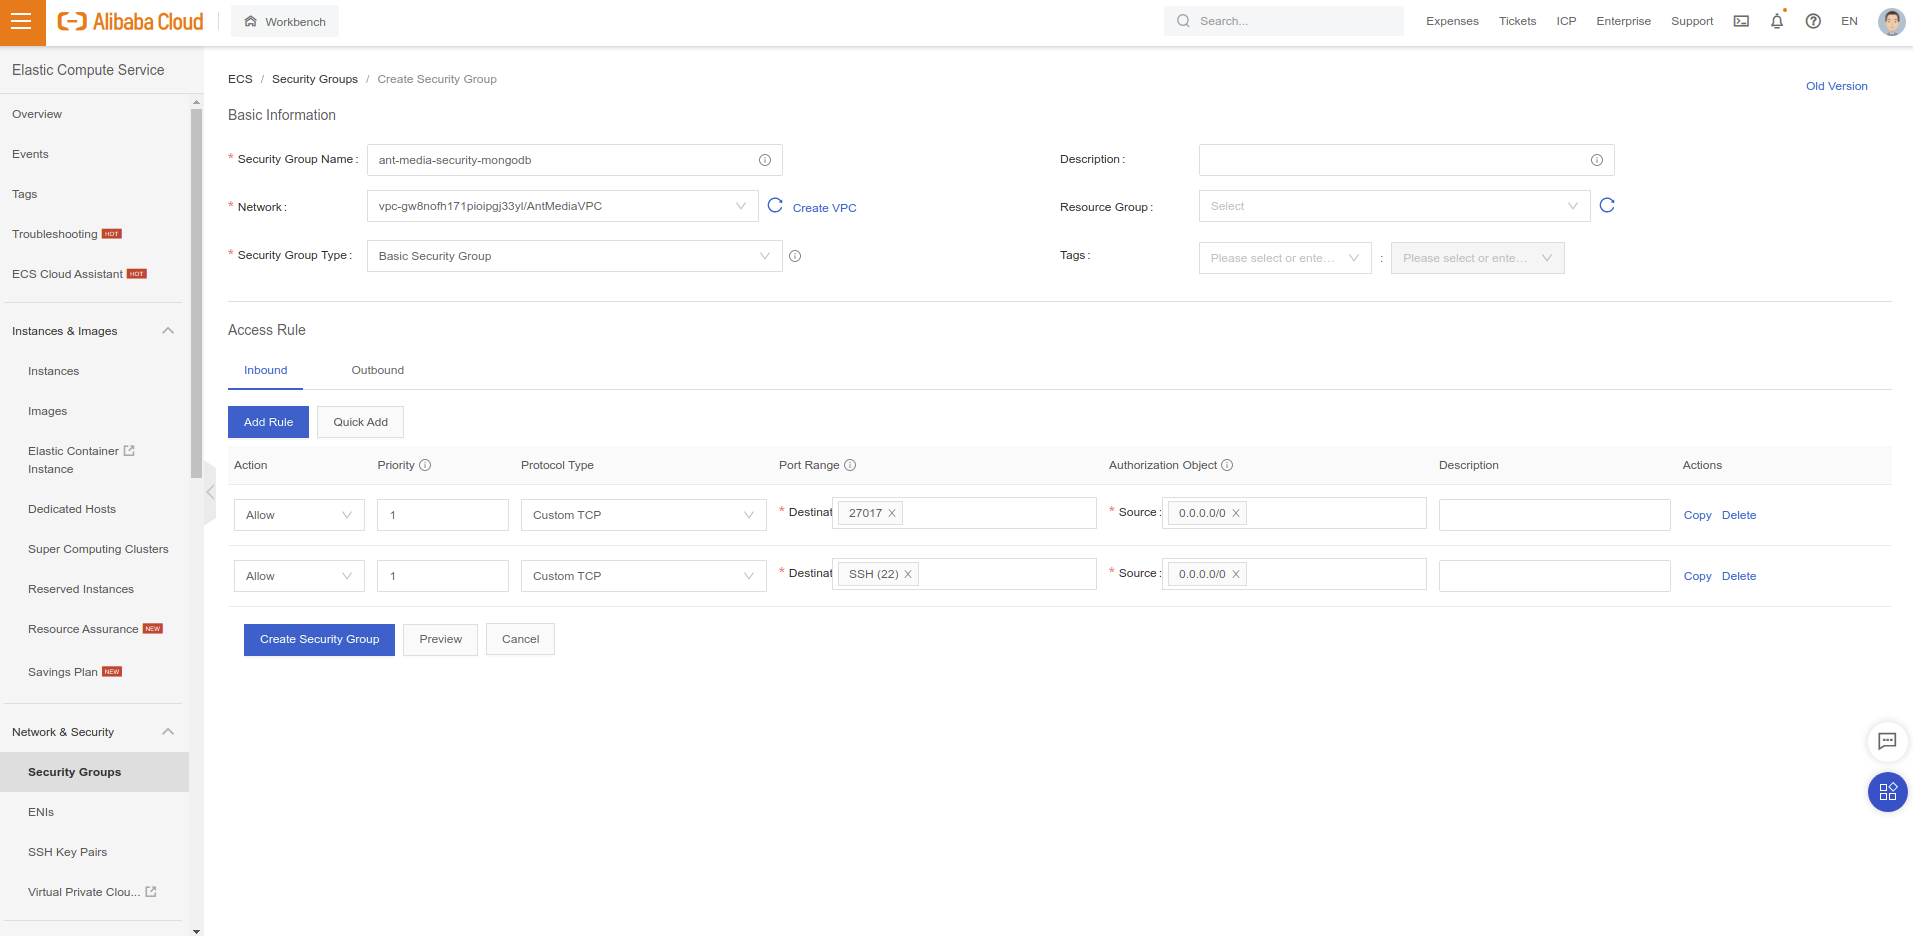
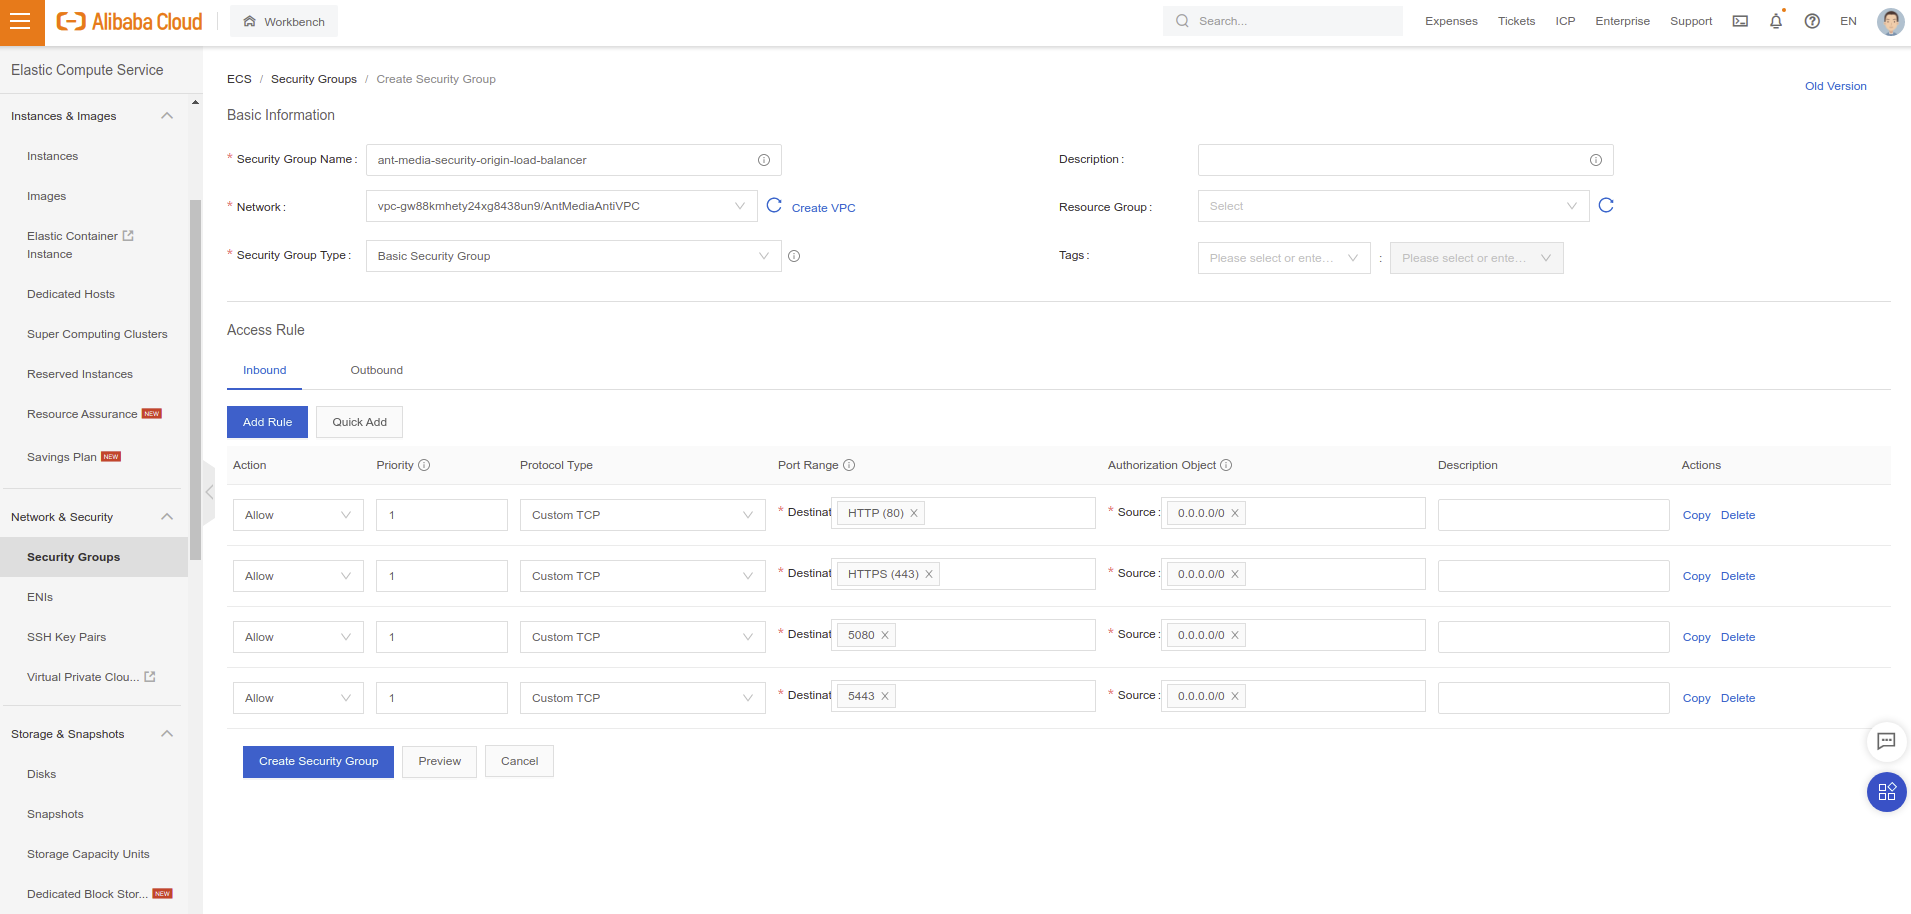
- Go to Elastic Compute Service / Network & Security / Security Groups section and click Create Security Group button.
- Add "22" and "27017" TCP ports as follows in the image.
- Go back to creating instance steps.
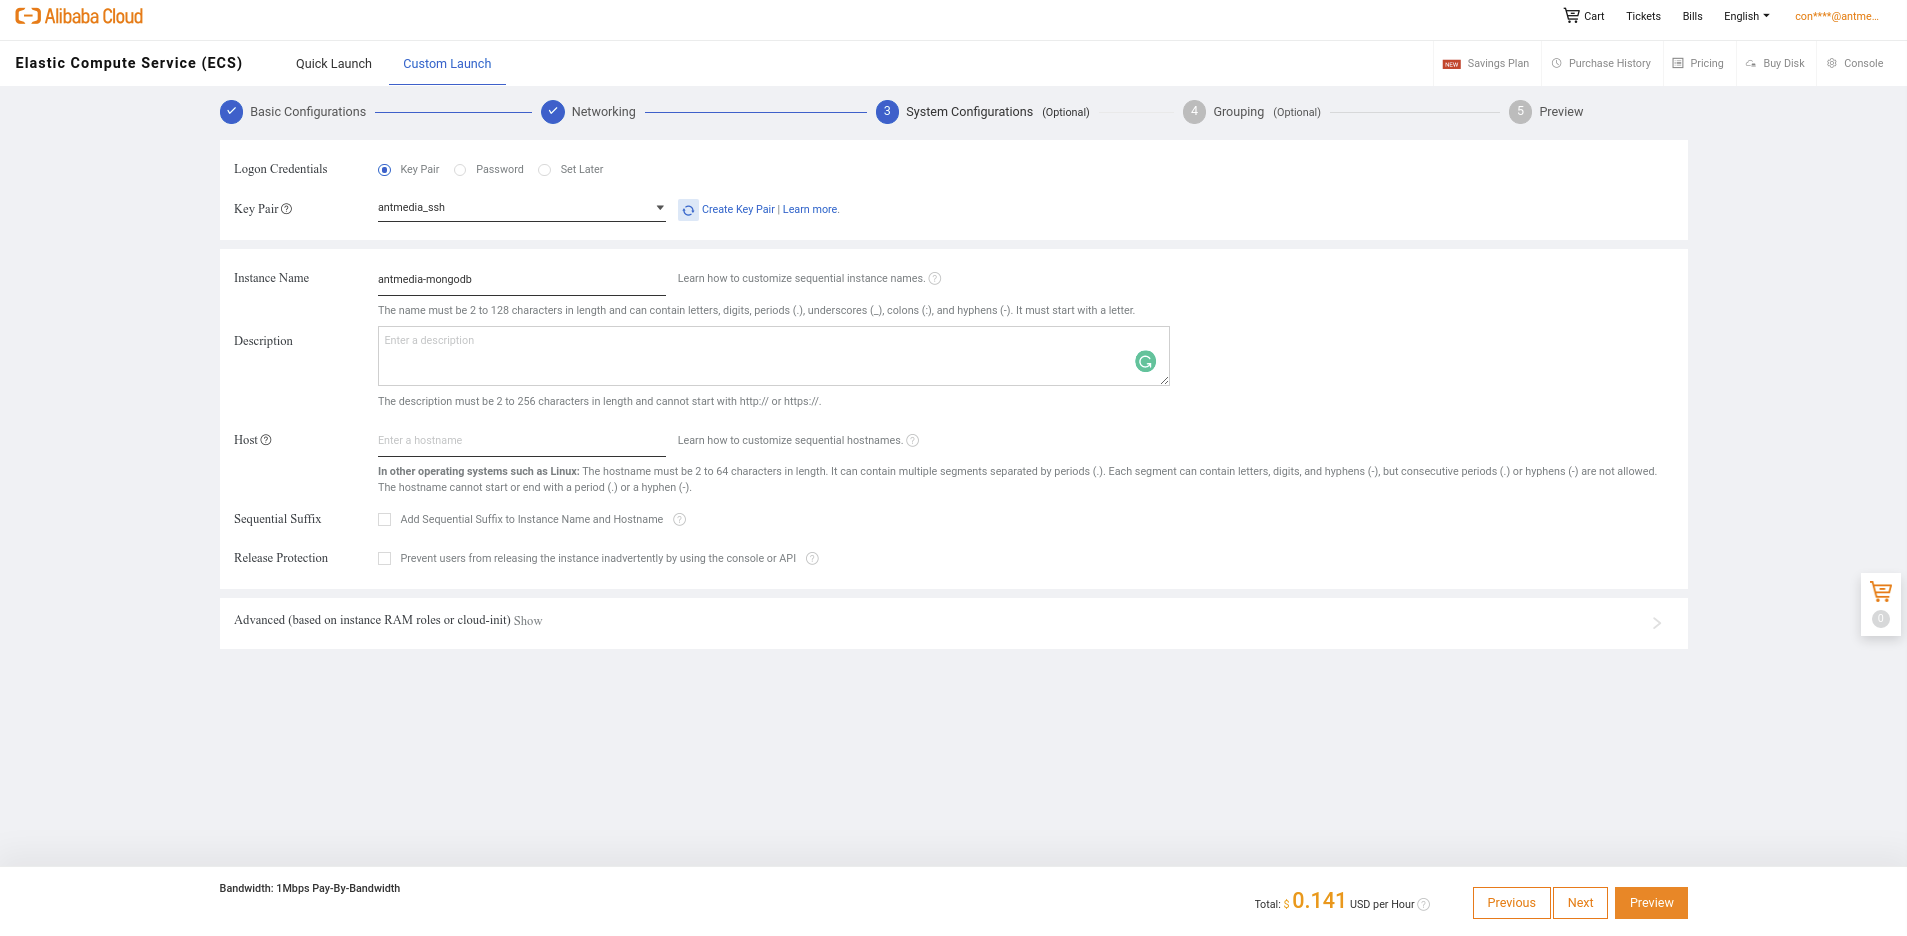
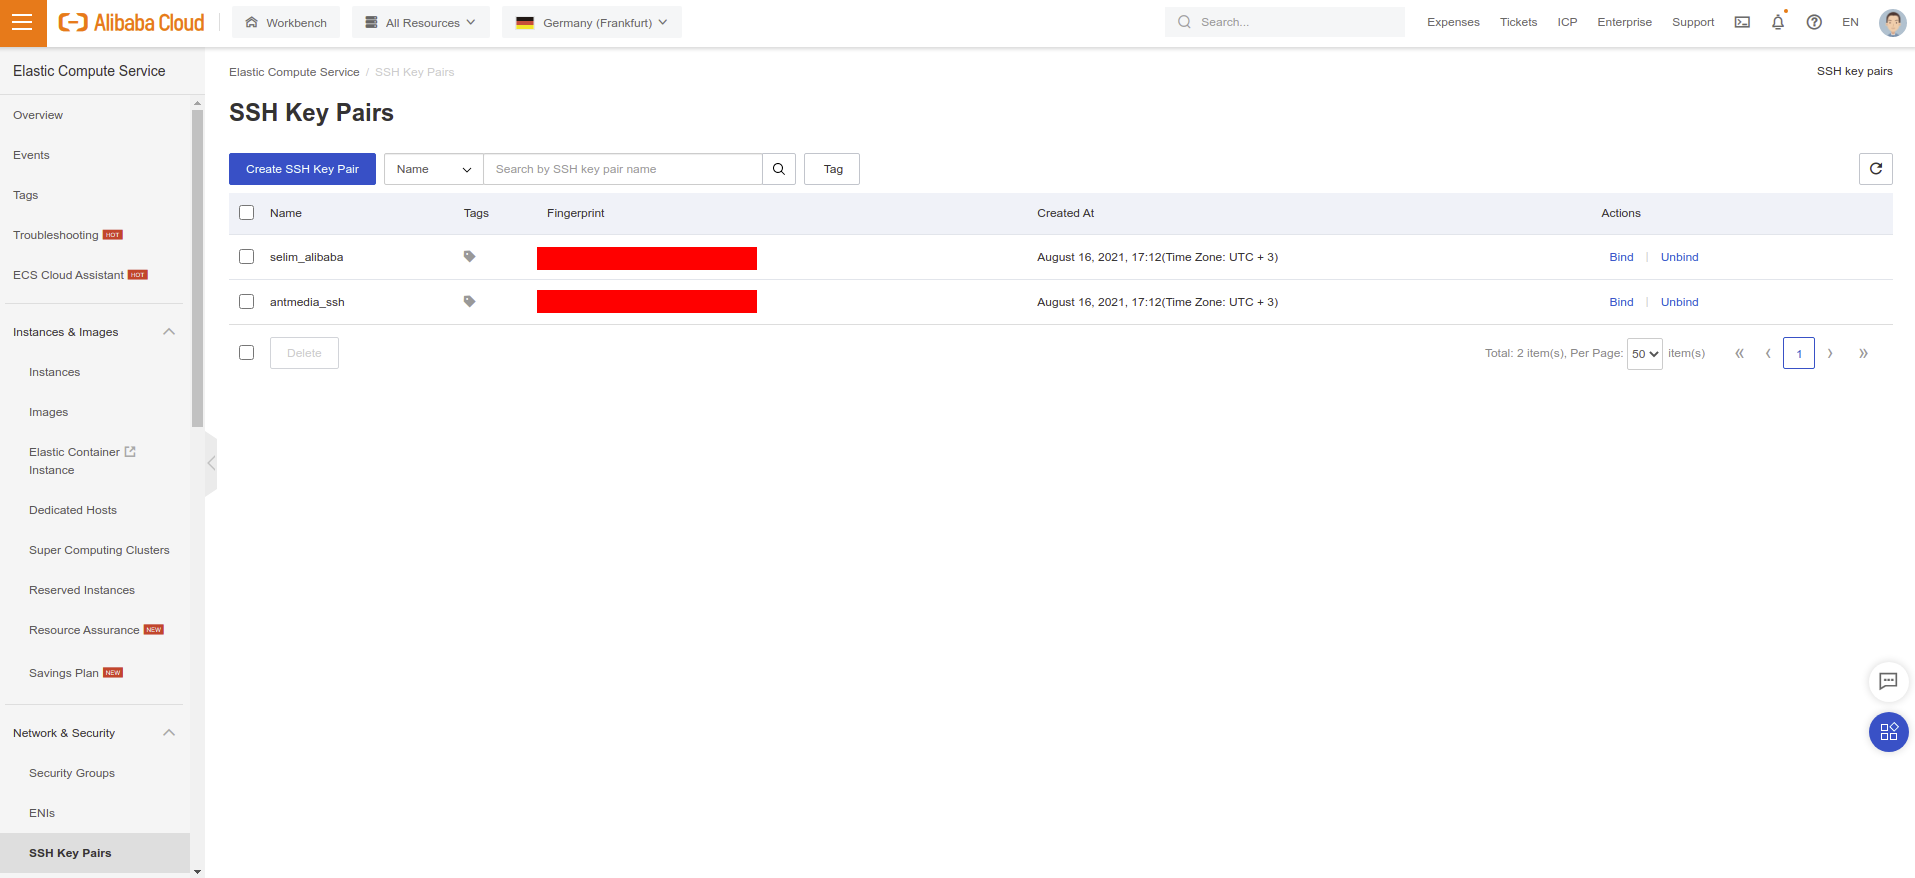
- You need to create an SSH key. If you already created SSH key, you can skip SSH key step.
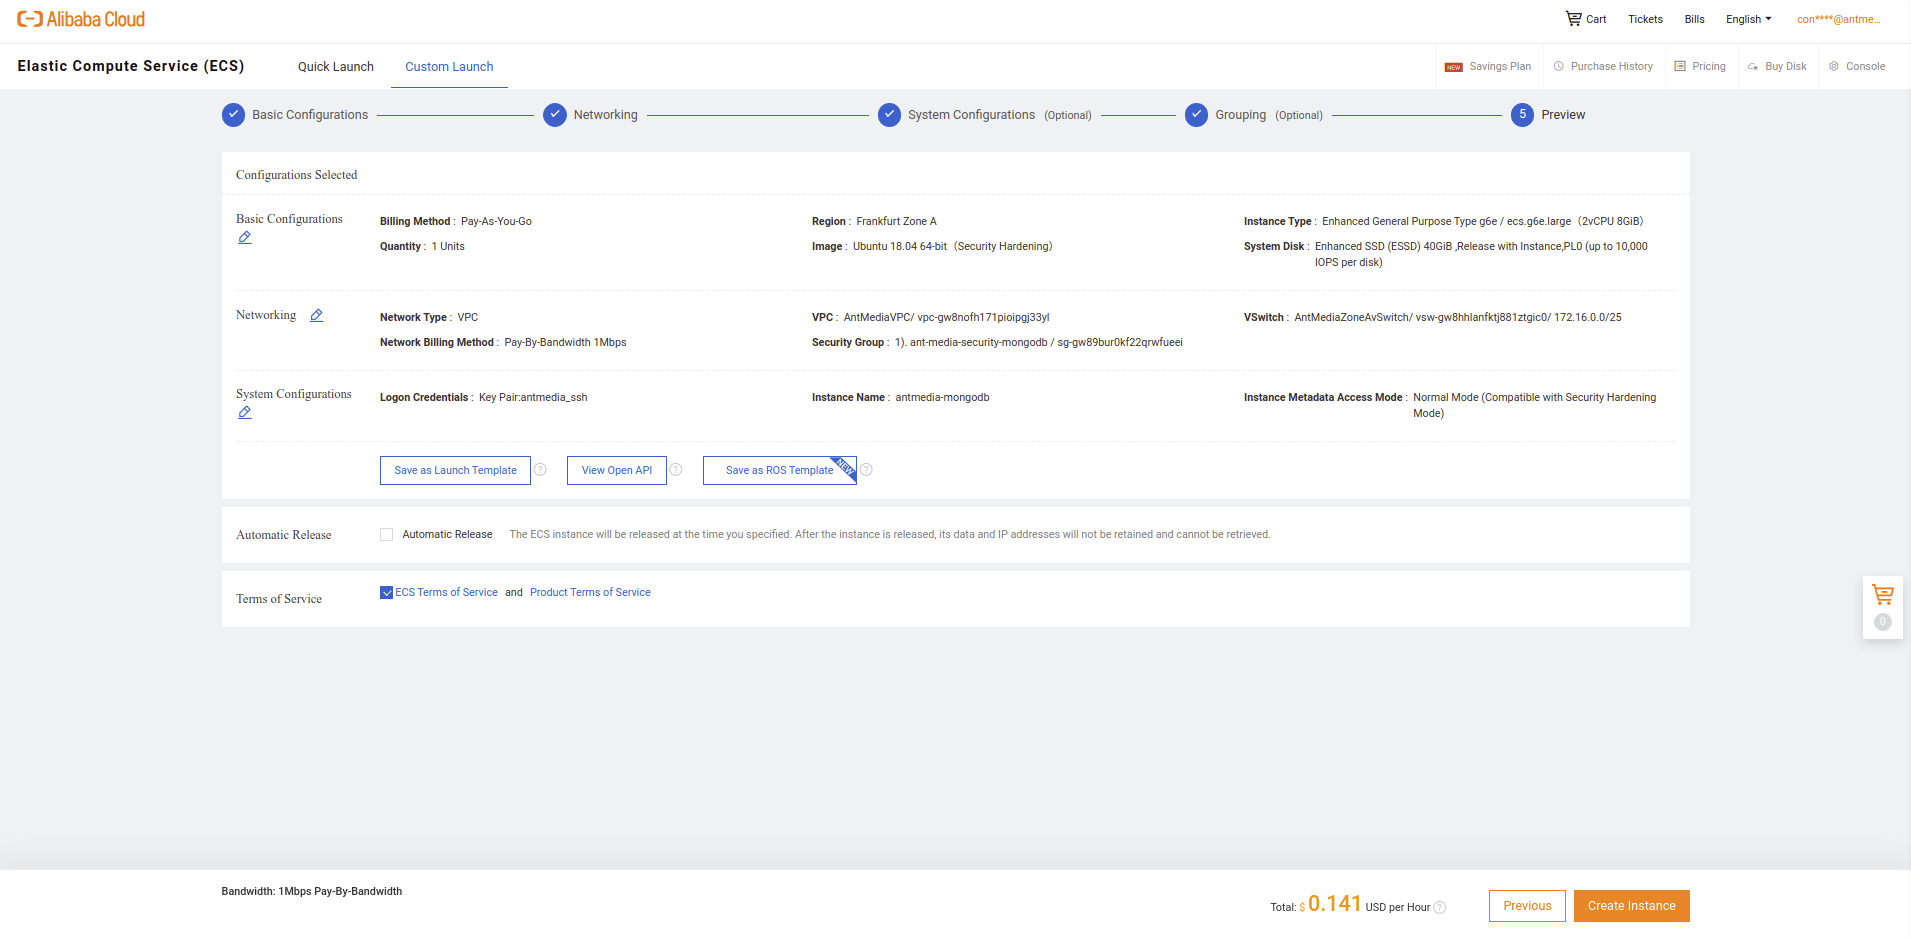
- After creating the SSH key, just click "Create Instance" button
-
Login your Instance according to Instance public IP address with a created SSH key.
-
Right now, you should connect to your instance. To Connect your instance, open a terminal and run a command something like. Please change {YOUR_KEY_FILE} and {INSTANCE_PUBLIC_IP} with your own credentials.
ssh -i {YOUR_KEY_FILE} root@{INSTANCE_PUBLIC_IP}
- After you get connected, run the following commands in order to install MongoDB to your instance
wget -qO - https://www.mongodb.org/static/pgp/server-4.2.asc | sudo apt-key add -
echo "deb [ arch=amd64 ] https://repo.mongodb.org/apt/ubuntu `lsb_release -cs`/mongodb-org/4.2 multiverse" | sudo tee /etc/apt/sources.list.d/mongodb-org-4.2.list
sudo apt-get update
sudo apt-get install -y mongodb-org
- Open /etc/mongod.conf file with an editor like nano and change bind_ip value to 0.0.0.0 to let MongoDB accept connections in all interfaces and save it.
sudo nano /etc/mongod.conf
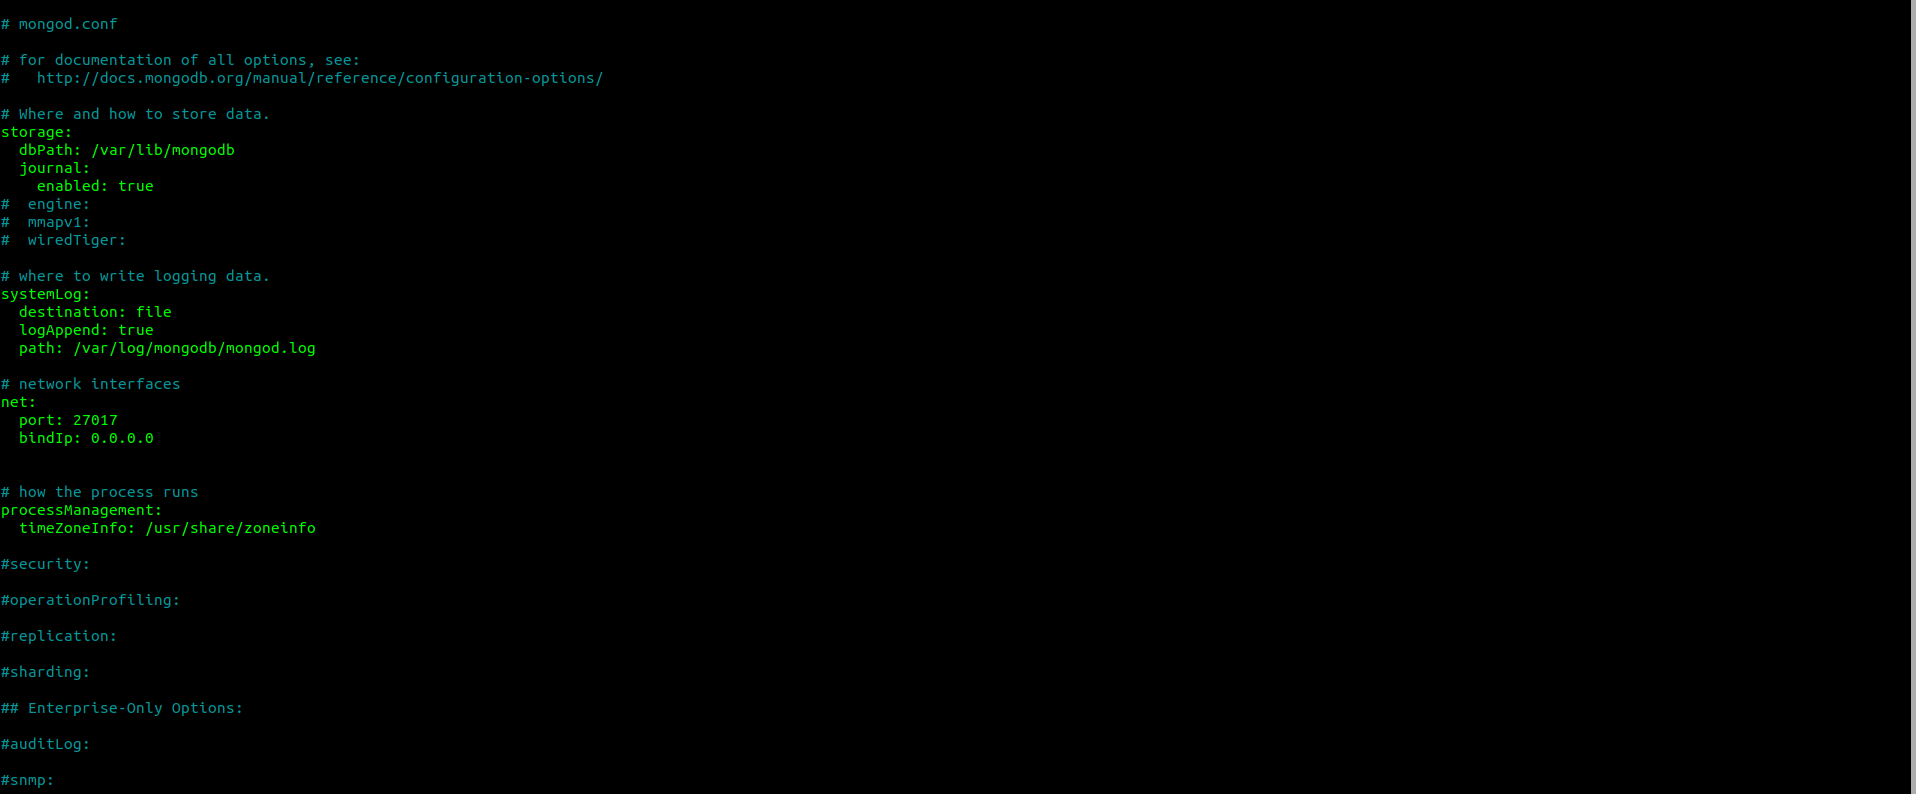
Press Ctrl + X to save the file.
Restart mongod and enable service.
sudo systemctl restart mongod
sudo systemctl enable mongod.service
MongoDB installation is complete, just save your MongoDB instance’s local address somewhere. We will use it in later.
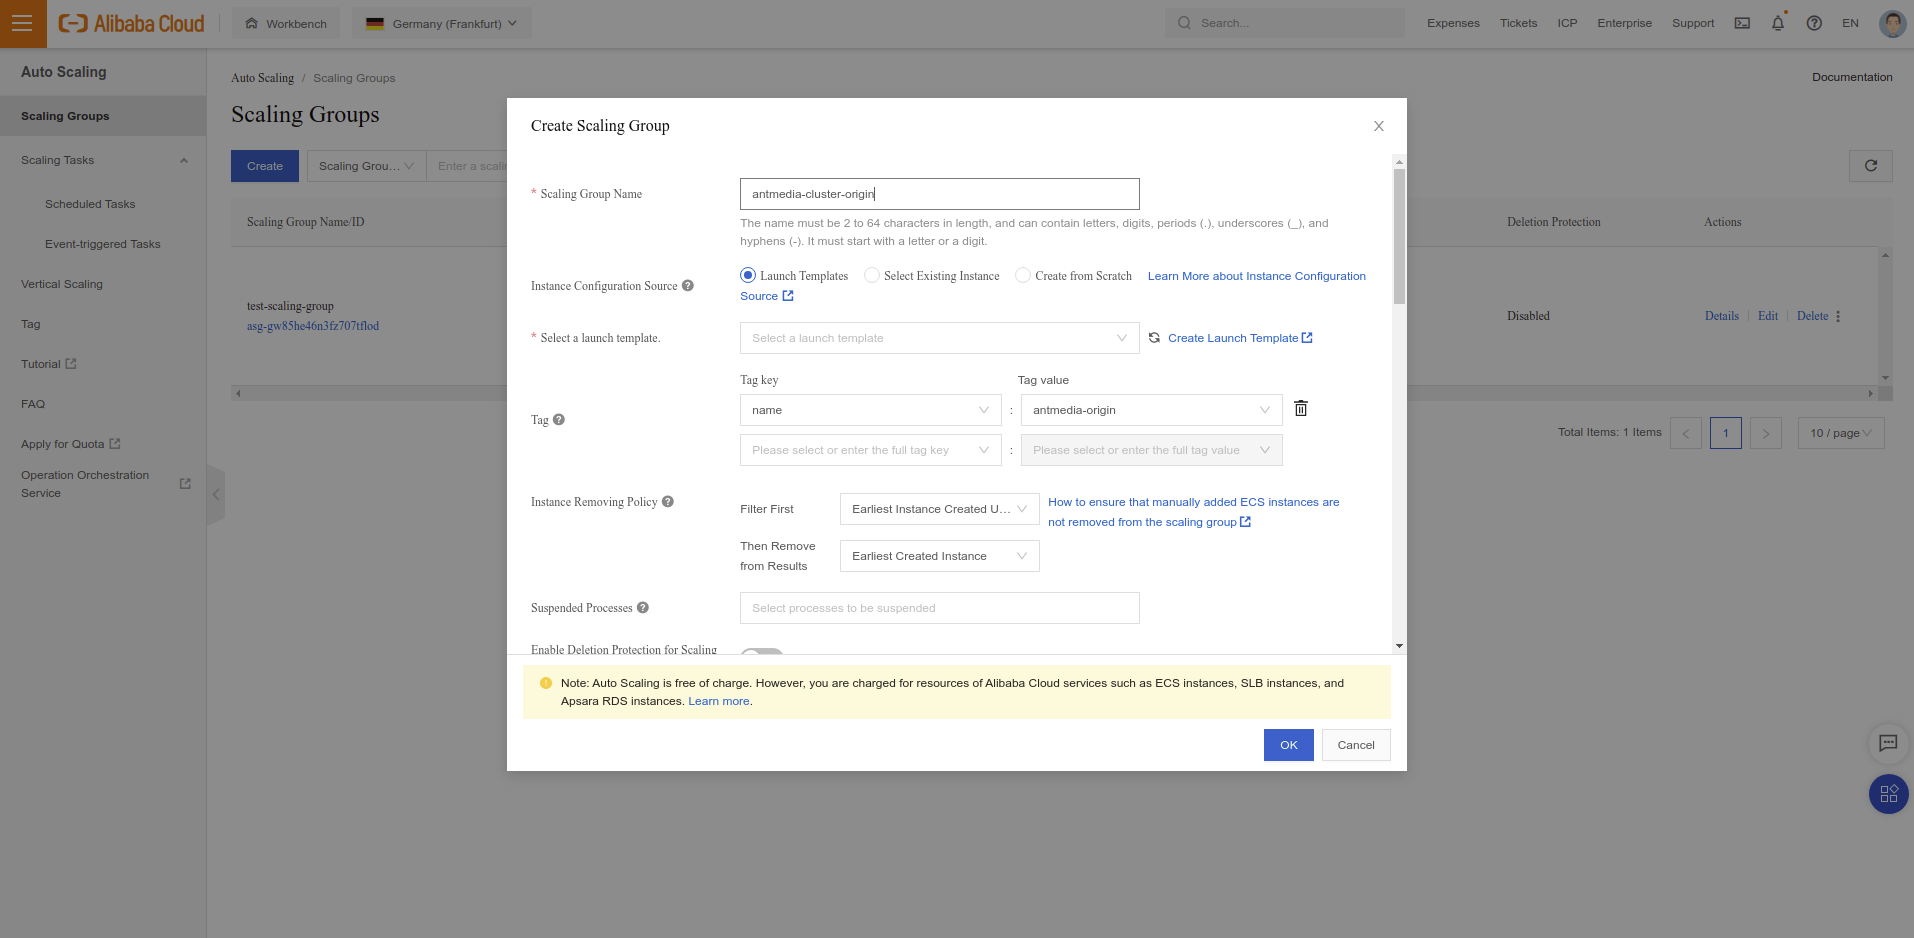
Step 2: Install Scalable Origin Group
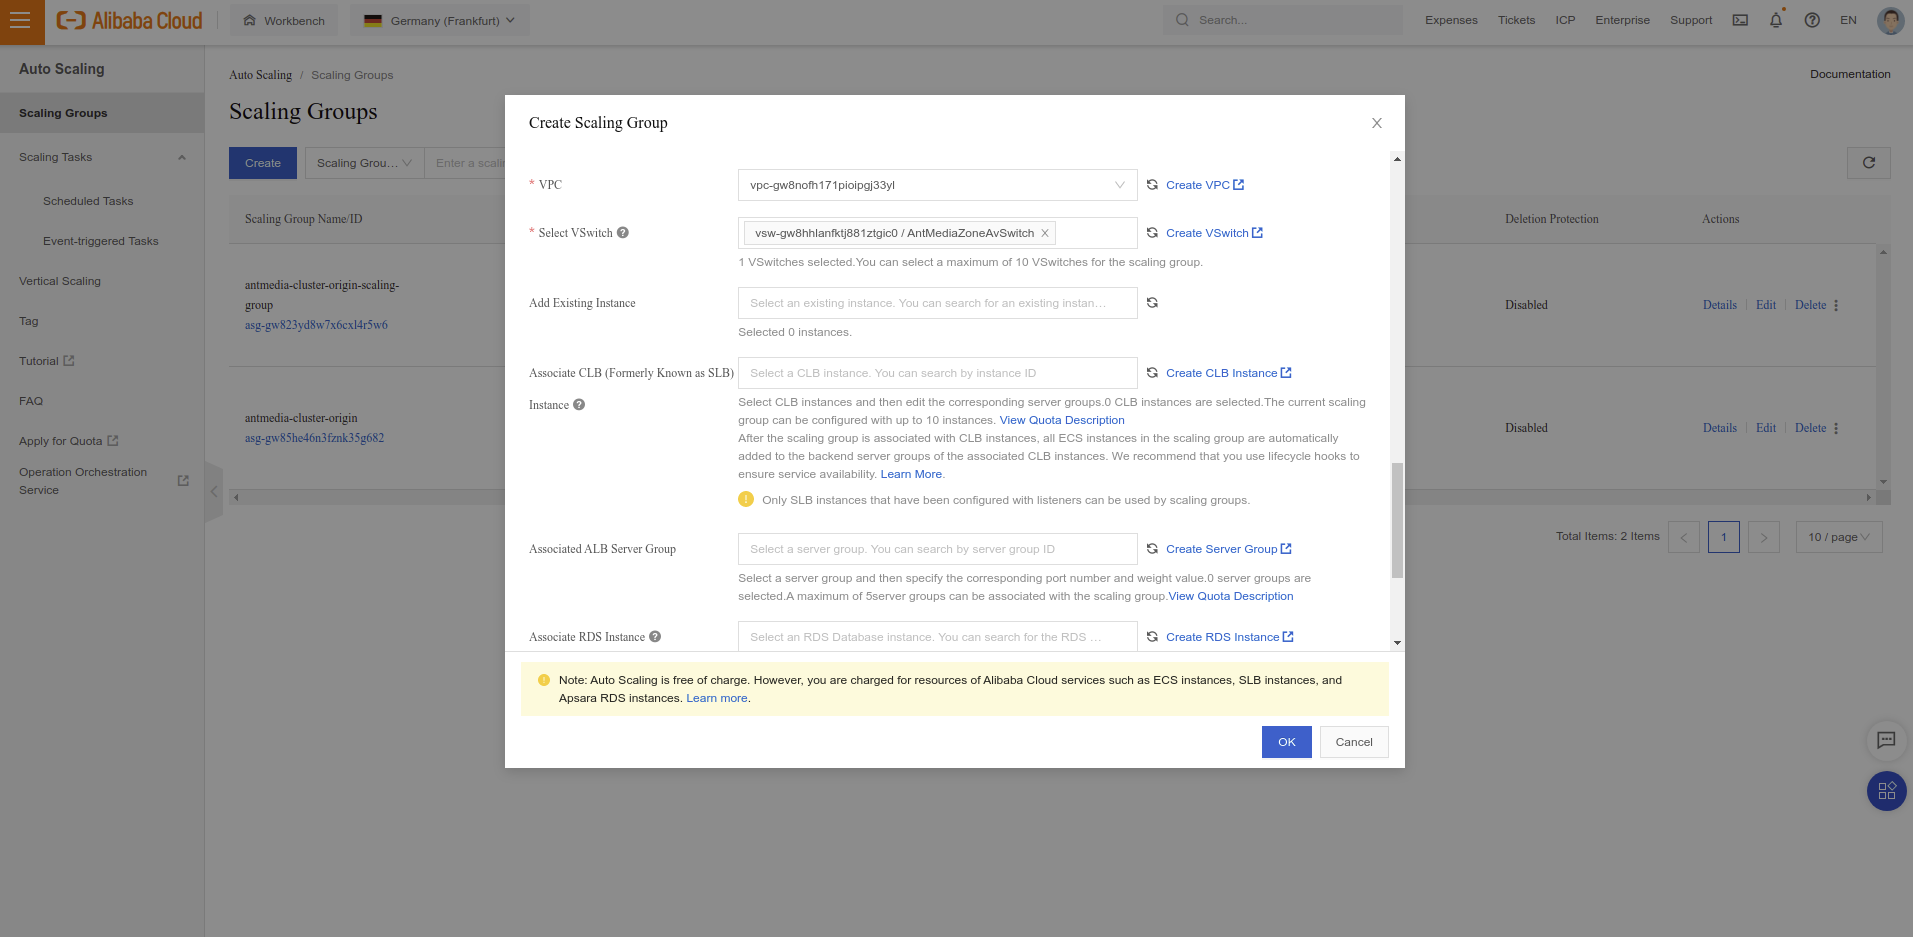
- Click "Deployment & Elasticity > Auto Scaling" and Click "Create" button.
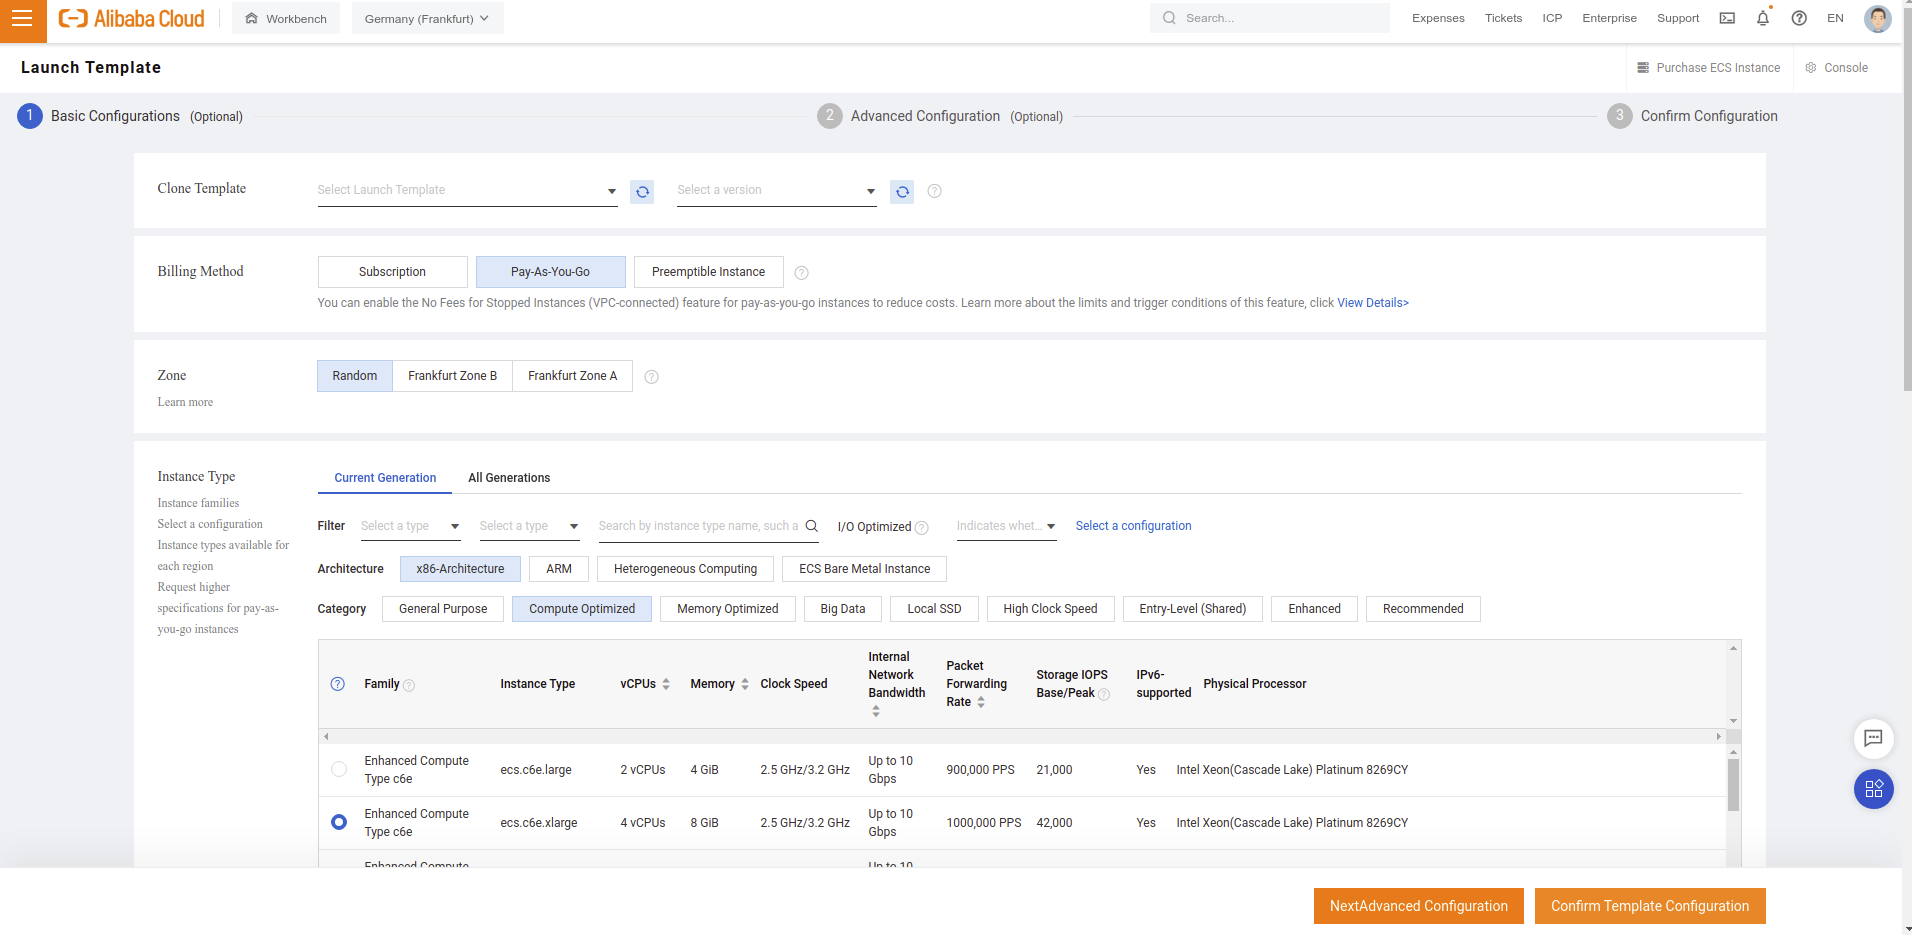
You need to have a Launch template for creating Instances. If you already have the Launch template, you can skip Create a Launch Template parts.
- Click "Deployment & Elasticity > Launch Template" and Click "Create Template" button.
- Select
Ant Media Marketplace image,VPC networkand clickAssign Public IPv4 Addressas follows.
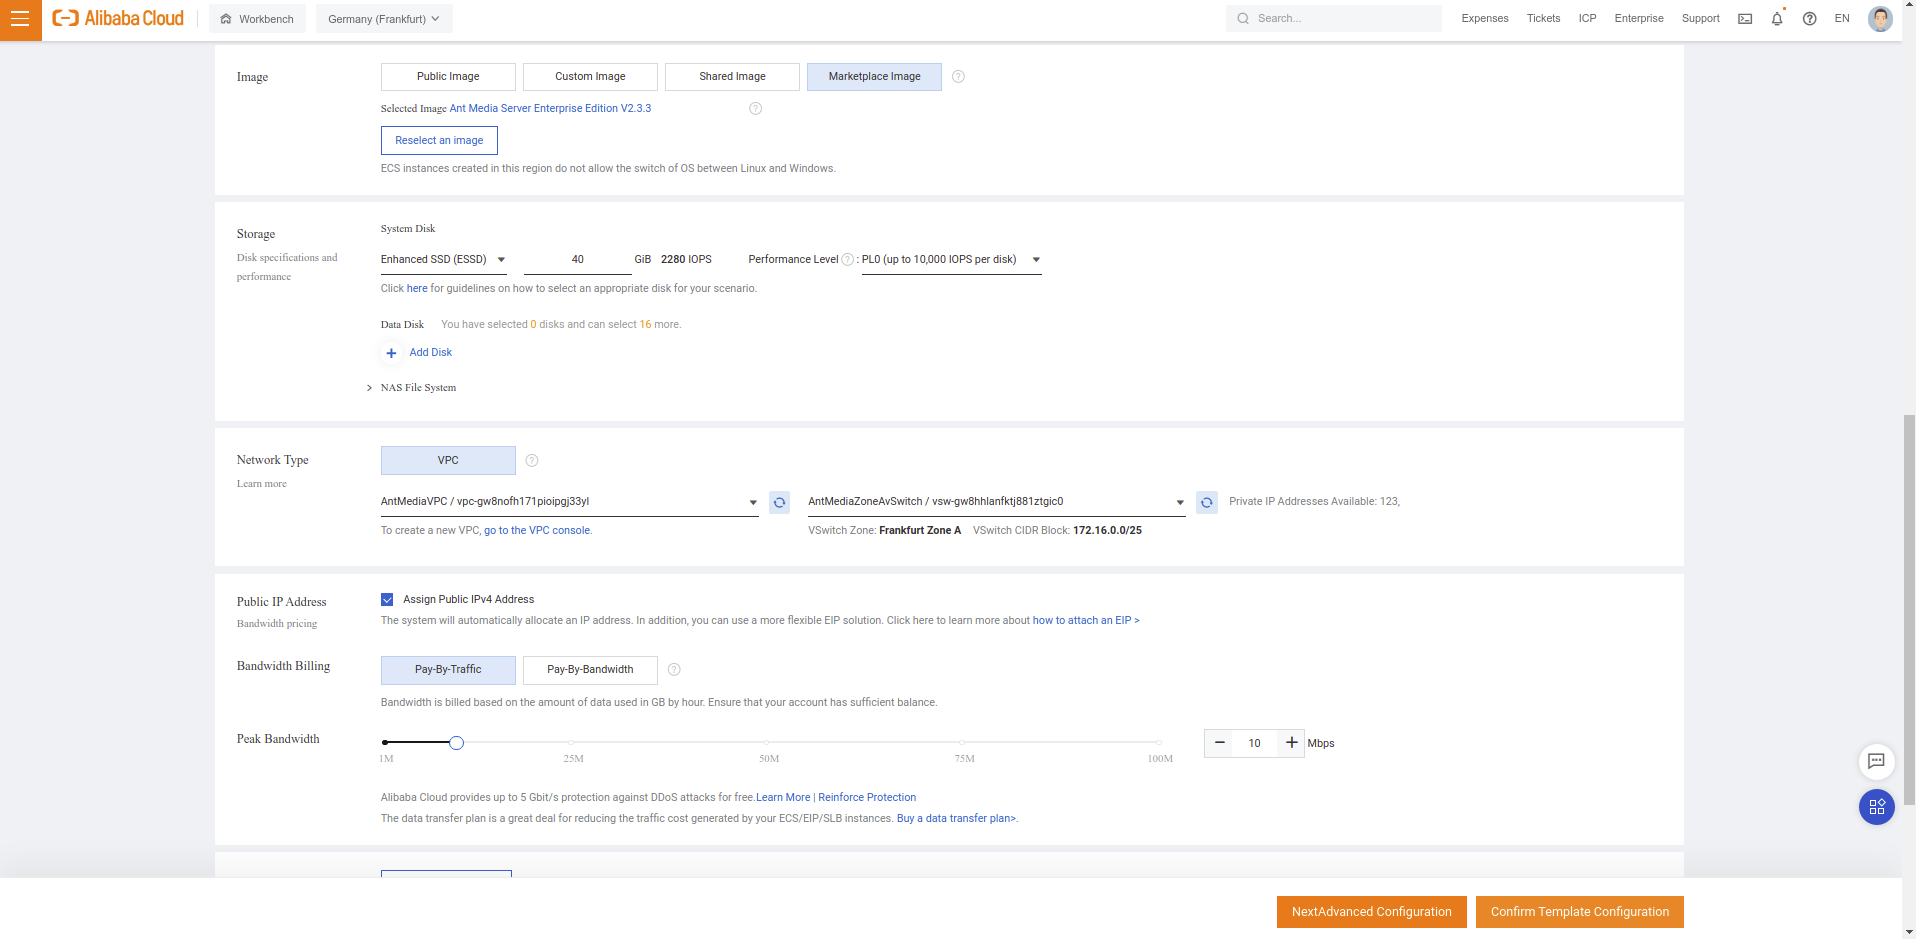
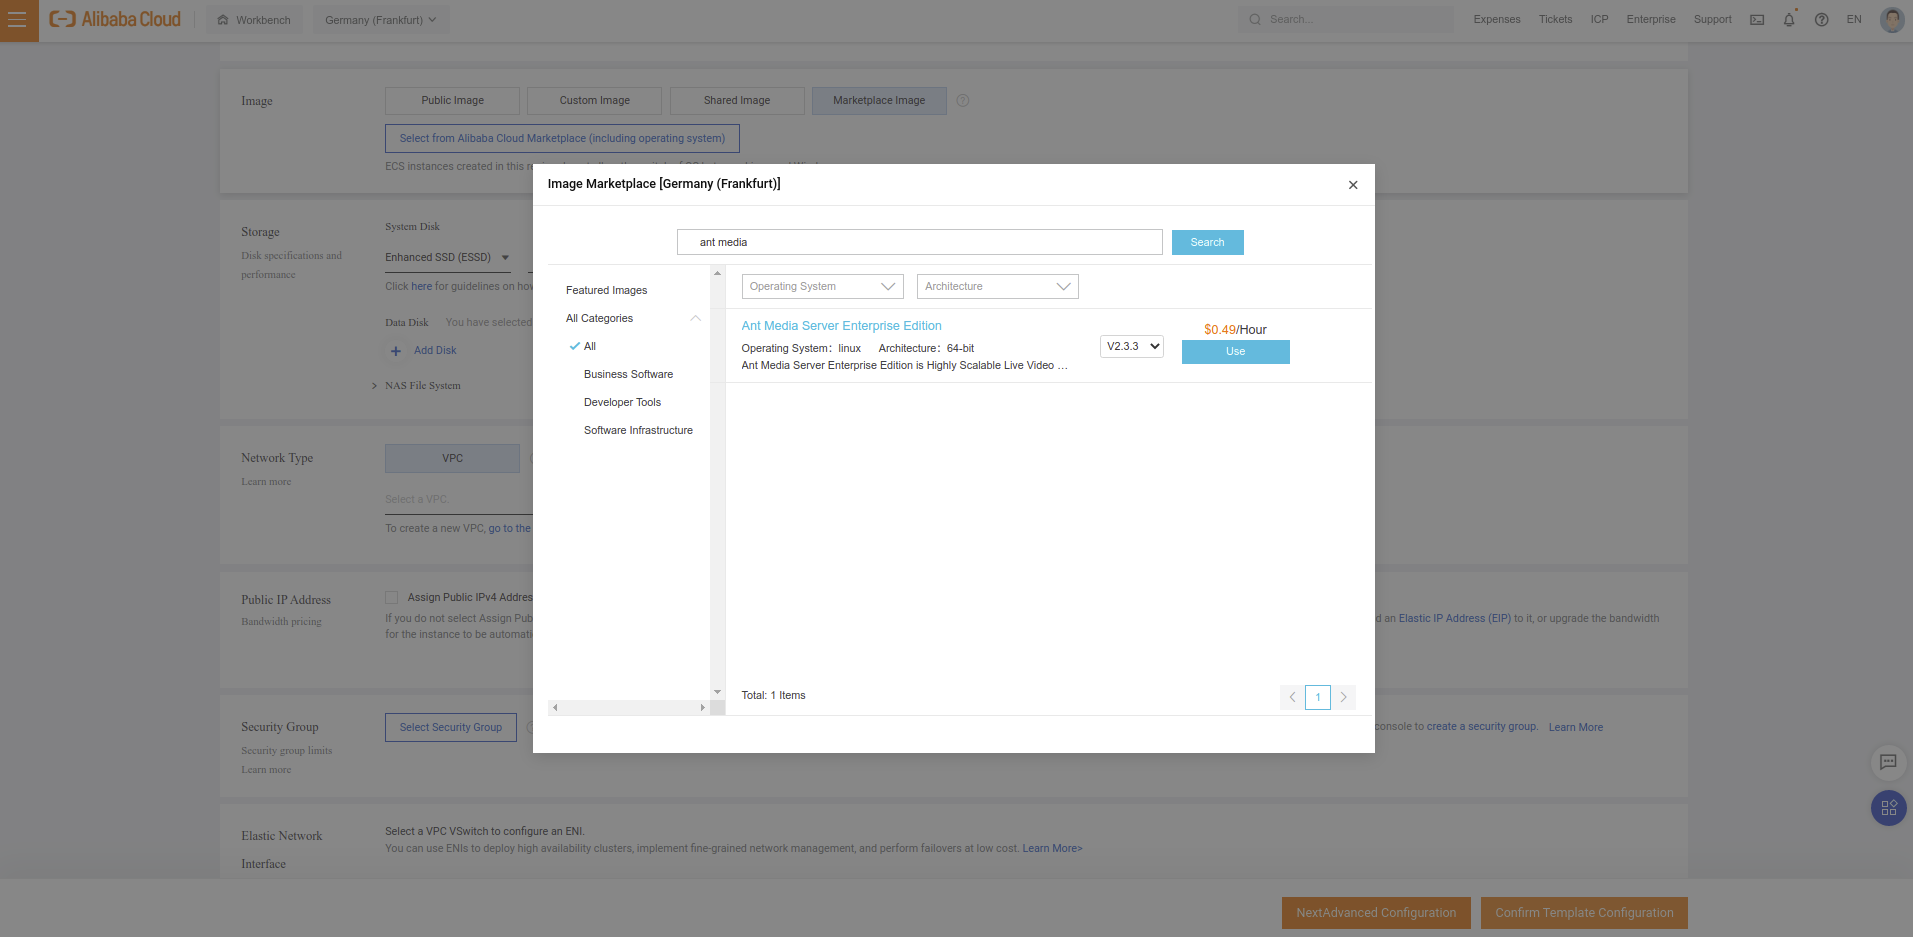
- Select
Ant Media Server Enterprise Editionas follows.
- Select/create Security Group as follows
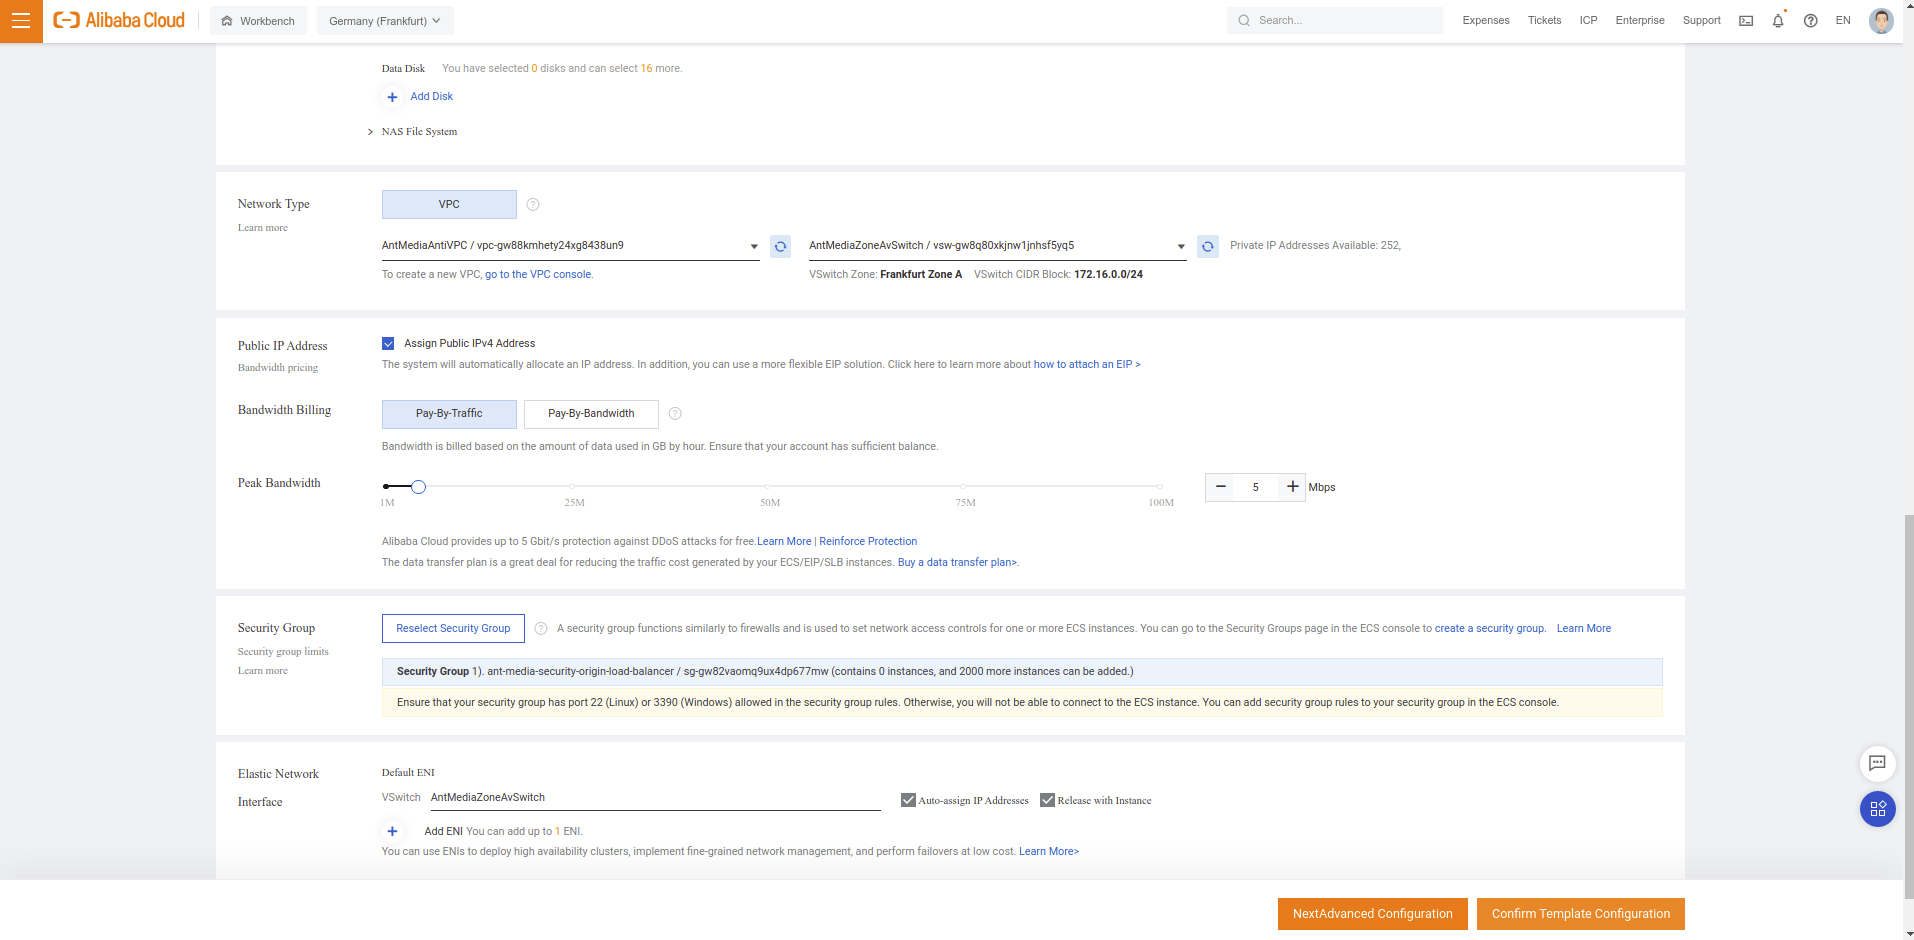
- Select VPC Network and click
Next Advanced Configurations
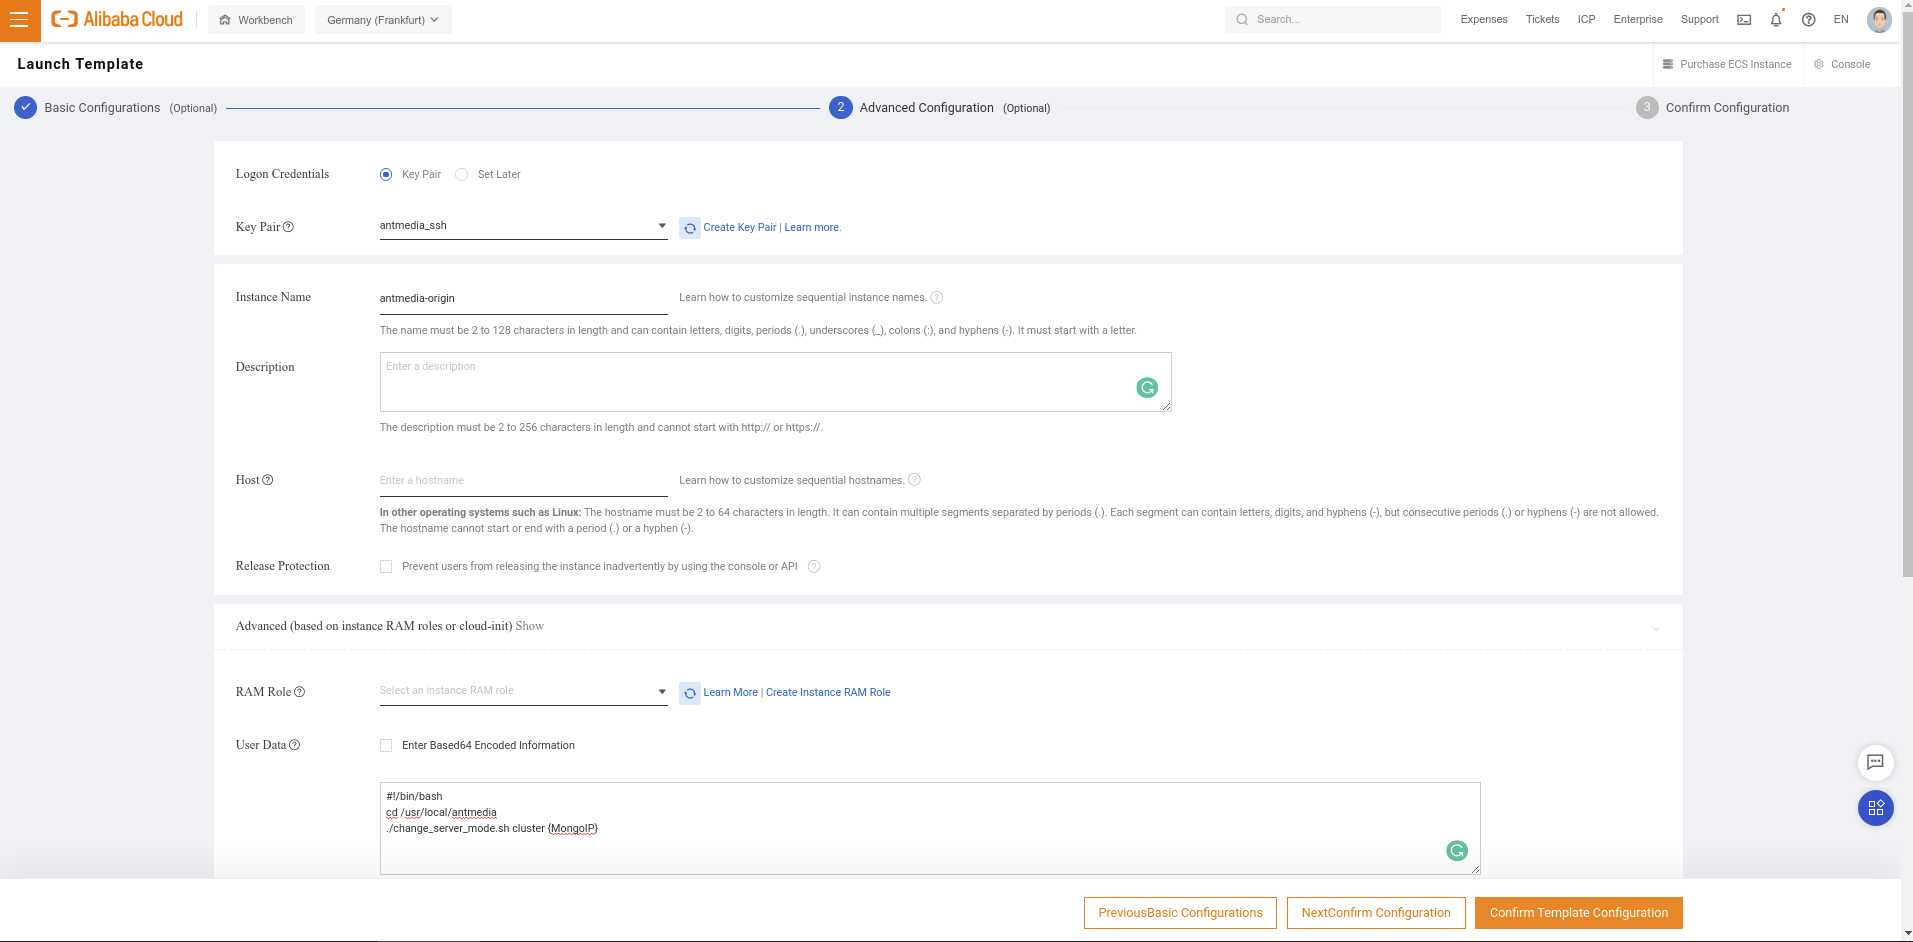
- Add SSH key pair, Instance name and User Data details as follows. Right now, copy the text below, change the "{MongoIP}" field with the MongoDB IP Address in the script and paste it to the "User data".
#!/bin/bash
cd /usr/local/antmedia
./change_server_mode.sh cluster {MongoIP}
After that Click "Confirm Complete Configuration"
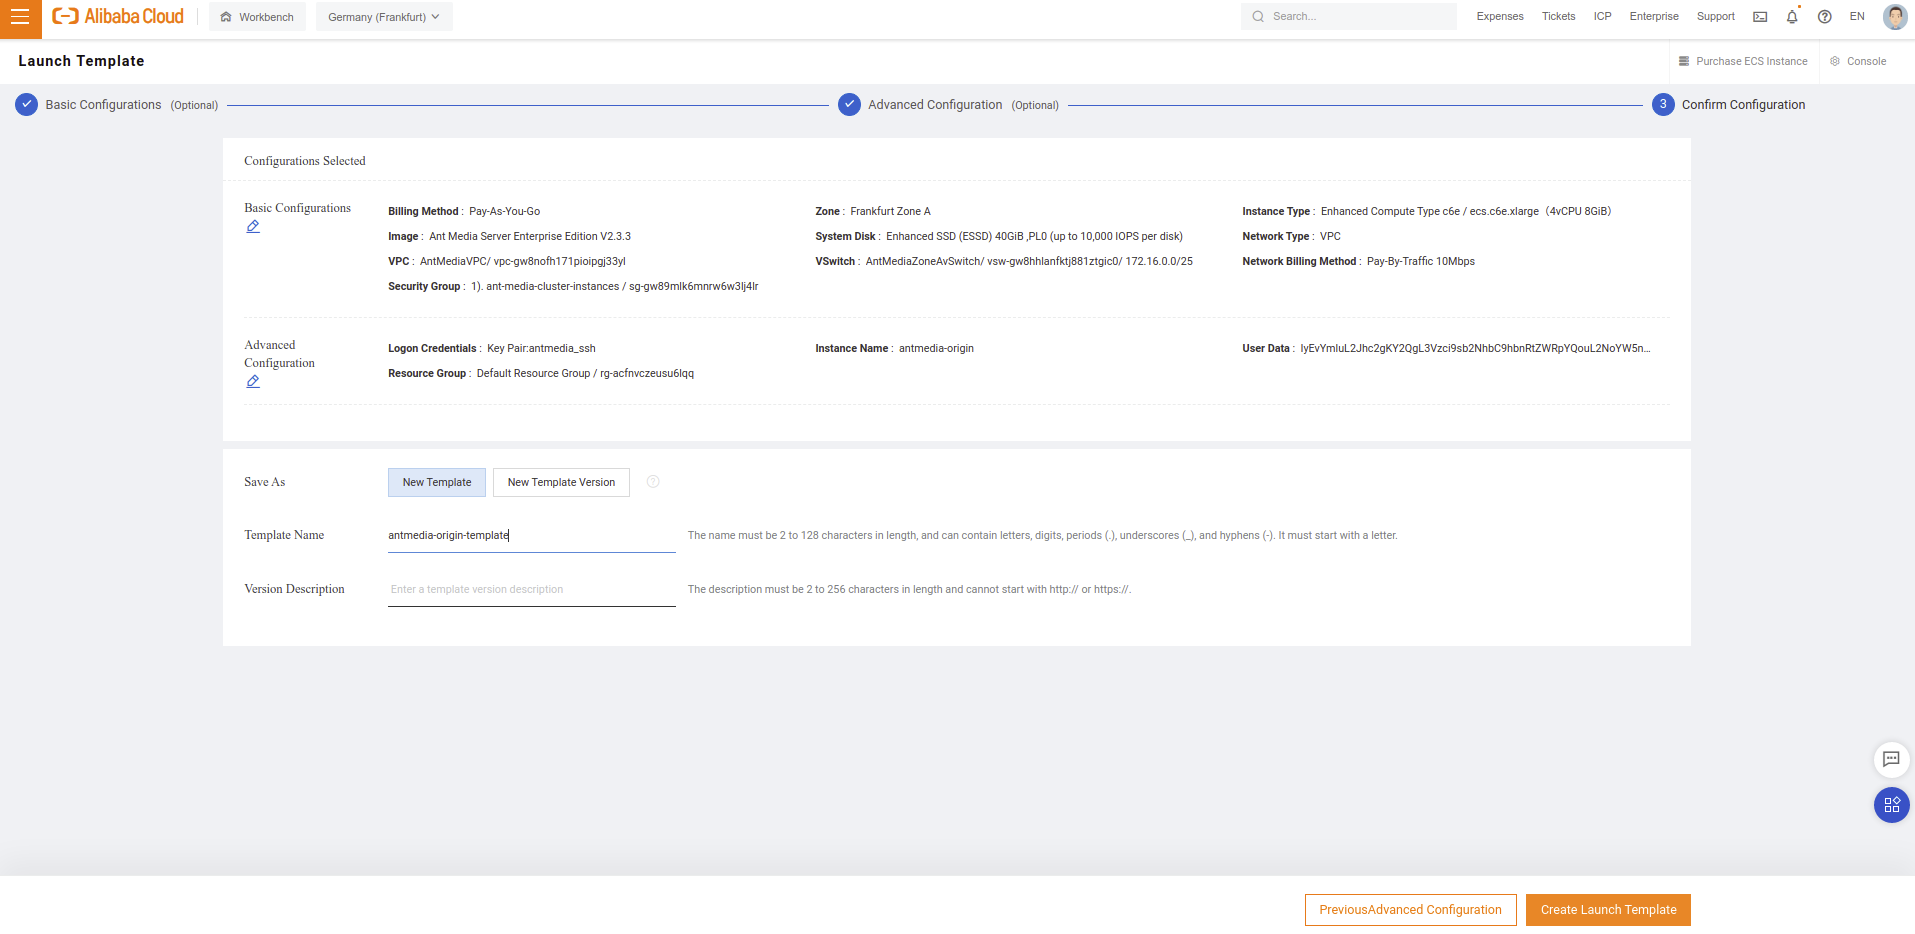
- Take a look at Launch Template and click Confirm Template Configuration
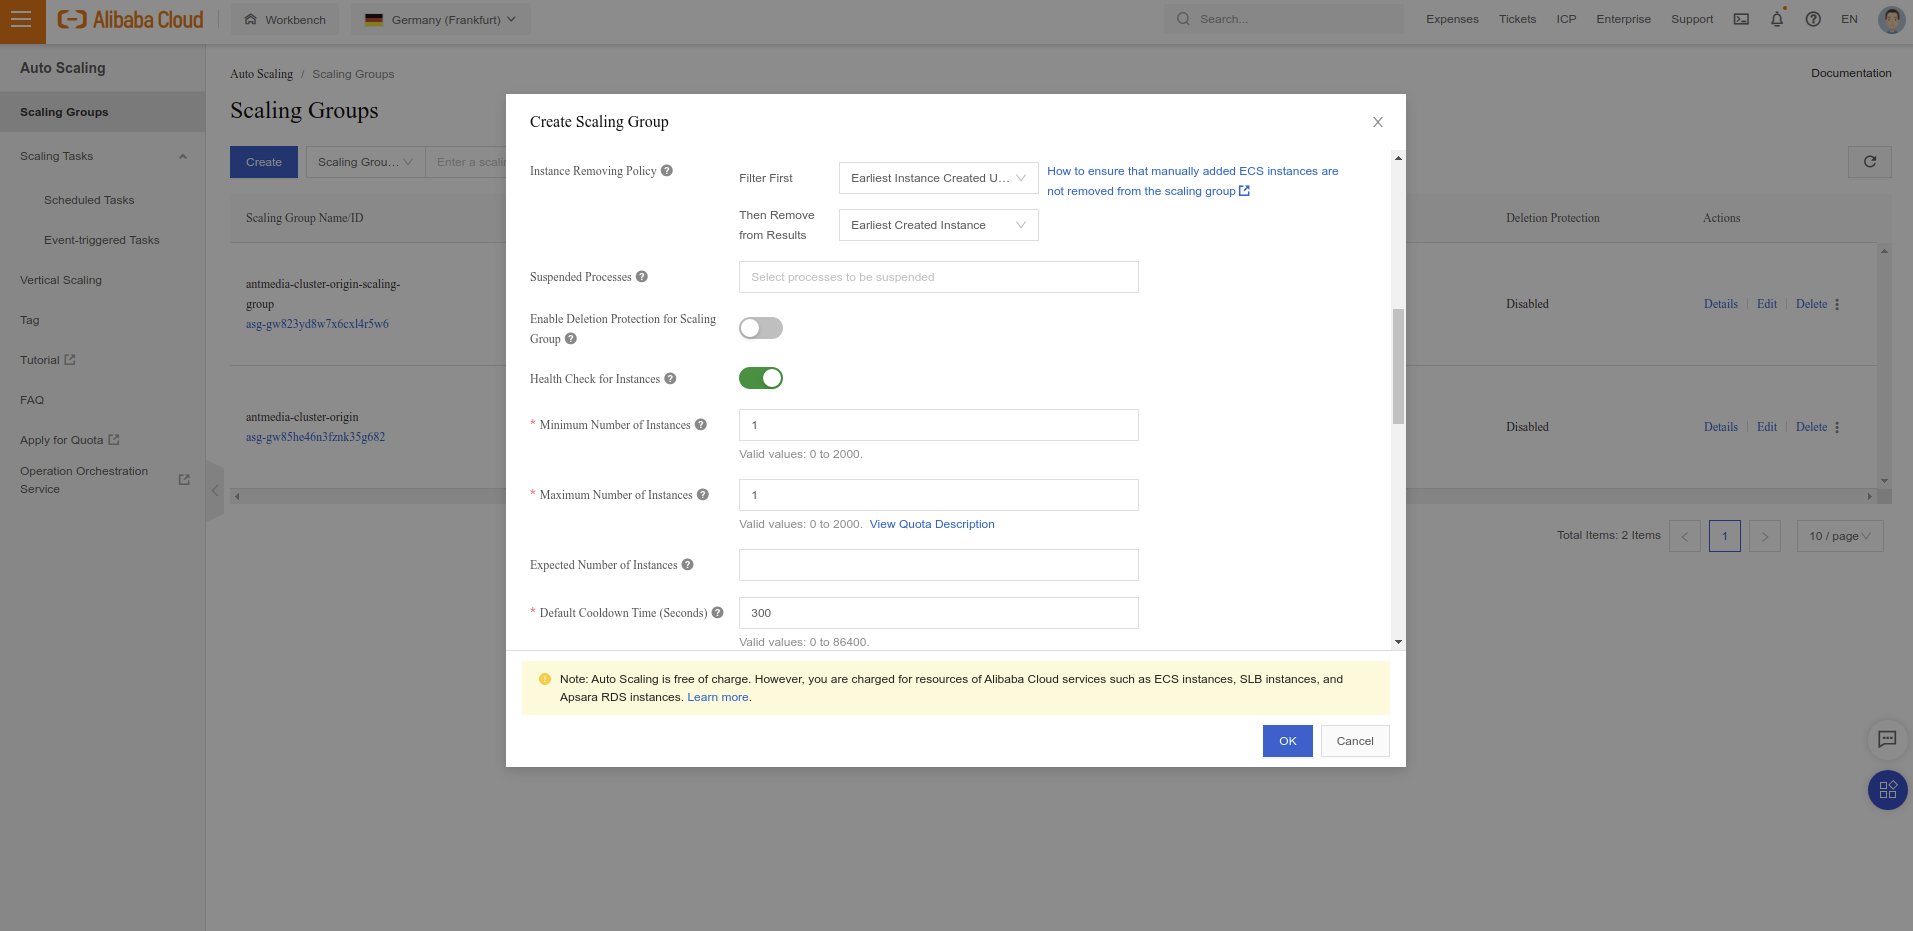
- Go back to Create Scaling Group steps and use created Launch Template.

- Set
Minimum Number of Instances,Maximum Number of InstancesandExpected Number of InstancesandDefault Cooldown Time (Seconds)as follows
- Set
VPC,Select vSwitchandCreate Associated ALB Server Group