
Passkey Flex provides passkey support for existing authentication systems. It abstracts the complexities of native passkey APIs and provides a simple, clean solution to take your authentication to the next level.
Use the passage-flex-react-native SDK in your React Native app to implement passkey registration, authentication, or additional step-up or multifactor authentication (MFA).
For full documentation, including setting up a backend SDK, visit the Passkey Flex documentation here.
- Create a Passkey Flex app in the Passage Console at https://console.passage.id
- Add an Android and/or iOS app in the Native Apps section
- When you add your Native App info, you can generate the associated domain file for that app if you haven’t already created it yourself, as shown below:
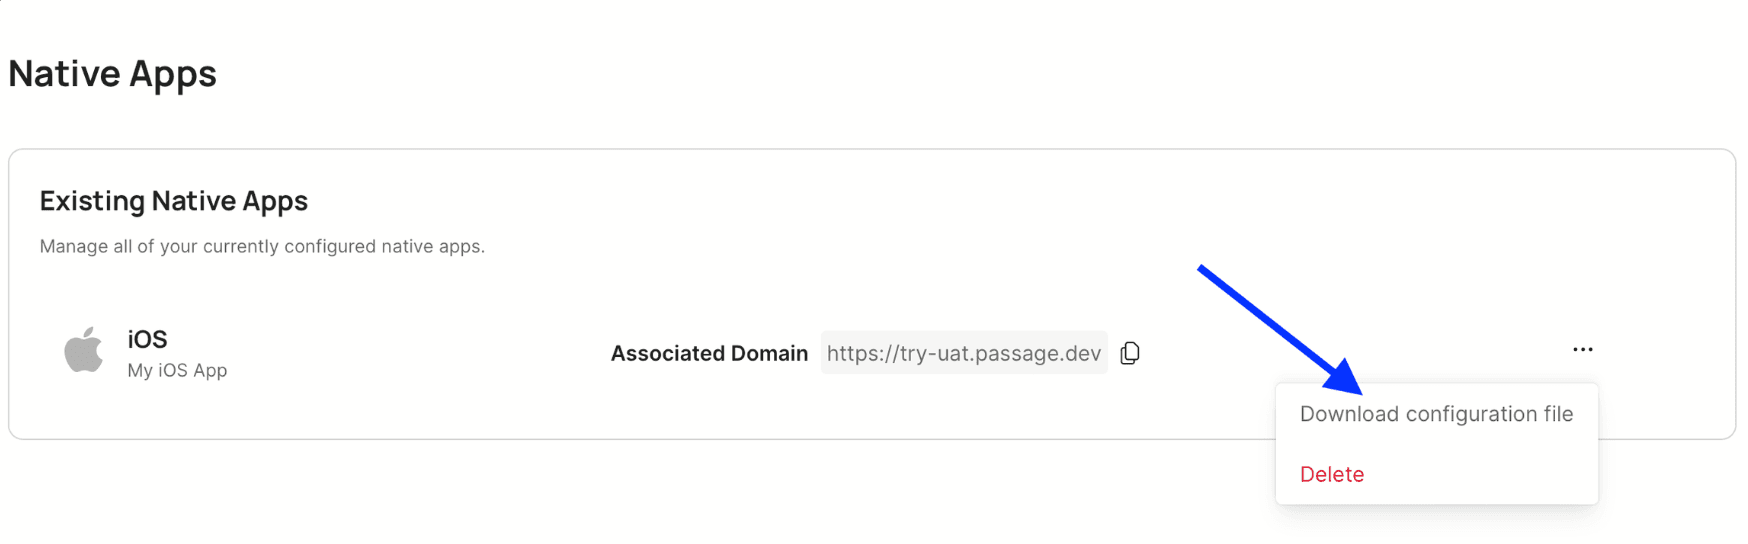
In order for passkeys to work, you’ll need to associate your native app(s) with the public web domain you assigned to your Passkey Flex app.
Android requires an assetlinks.json file configured and hosted (learn more here).
Apple requires an apple-app-site-association file configured and hosted (learn more here).
Install this package using npm:
npm i --save @passageidentity/passage-flex-react-native
-
Add plugin in app.json:
"plugins": [
      "@passageidentity/passage-flex-react-native"
]
-
Add
ASSOCIATED_DOMAINvalue to your app's.envfile:ASSOCIATED_DOMAIN=example.com -
Run
npx expo prebuild
See our Passkey Complete documentation for setting up a React Native app for passkeys and Passage.
Import PassageFlex:
import { PassageFlex } from '@passageidentity/passage-flex-react-native';Initialize a Passage Flex instance using your appId found in Passage Console:
const passageFlex = new PassageFlex('YOUR_APP_ID');To register a new user passkey, use the passageFlex.passkey.register method.
This is a three step process:
- Your app should POST a user identifier (like an email) to your backend, which should request a transaction id from the Passage server to return to your app.
- Your app should then call
passageFlex.passkey.register(transactionId)to prompt your user to create a passkey. On success, theregistermethod will return a nonce. - Lastly, your app should send this nonce to your backend to verify the user has been registered successfully. At this point, your backend could return an access token.
Example:
const onPressRegister = async () => {
  // 1. Get transaction id string from your backend.
  const transactionId = await getRegisterTransactionId("newuser@email.com");
  // 2. Prompt user to create a passkey and get a Passage nonce value on success.
  const nonce = await passageFlex.passkey.register(transactionId);
  // 3. You can send this nonce to your backend to complete user registration.
  const accessToken = await getAccessToken(nonce);
};To log in a user using a passkey, use the passageFlex.passkey.authenticate method.
This is a three step process:
- Your app should POST a user identifier (like an email) to your backend, which should request a transaction id from the Passage server to return to your app.
- Your app should then call
passageFlex.passkey.authenticate(transactionId)to prompt your user to log in with a passkey. On success, theauthenticatemethod will return a nonce. - Lastly, your app should send this nonce to your backend to verify the user has been authenticated successfully. At this point, your backend could return an access token.
Example:
const onPressLogIn = async () => {
  // 1. Get transaction id string from your backend.
  const transactionId = await getLogInTransactionId("existinguser@email.com");
  // 2. Prompt user to create a passkey and get a Passage nonce value on success.
  const nonce = await passageFlex.passkey.authenticate(transactionId);
  // 3. You can send this nonce to your backend to complete user authentication.
  const accessToken = await getAccessToken(nonce);
};You can check if a user’s device supports passkeys by calling passageFlex.passkey.isSupported:
const deviceSupportsPasskeys = passageFlex.passkey.isSupported();See the contributing guide to learn how to contribute to the repository and the development workflow.
Give customers the passwordless future they deserve. To learn more check out passage.1password.com
This project is licensed under the MIT license. See the LICENSE file for more info.