-
Notifications
You must be signed in to change notification settings - Fork 143
How to get Instagram API access token and fix your broken feed
THIS GUIDE IS NOT LONGER VALID DUE TO INSTAGRAM PLATFORM CHANGES.
Please refer to the new guide.
Instagram changed up the API to require Access Tokens to use even the most basic ‘media’ endpoint requests.
If you already have an access token, any access token that you have generated so far does not contain these new scopes, so you will need to re-authenticate your users with the new scopes. If you don't do that, old access tokens will not work with the endpoints that require the new scopes, but will continue to work for all other endpoints.
This is a quick breakdown on the steps to get the Access Token on your local machine… and you don’t have to be a coder or developer to follow most of these steps and fix your Instagram feed.
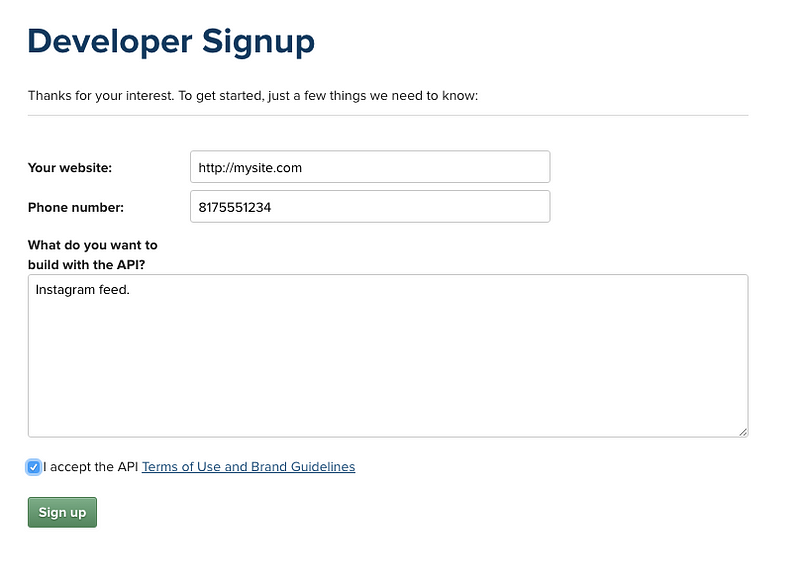
Visit https://www.instagram.com/developer and register a new app
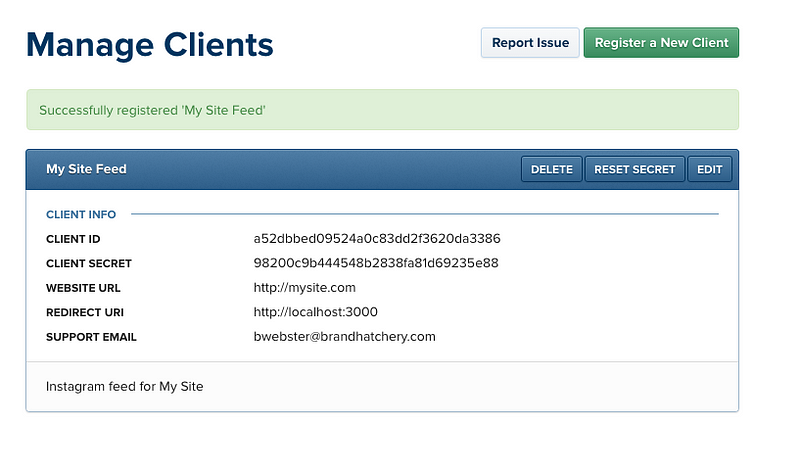
Go to Manage Clients, and hit ‘Register a New Client’ to register and gain API access
Copy the Client ID here, or at least keep this tab open, you will need the Client ID soon.
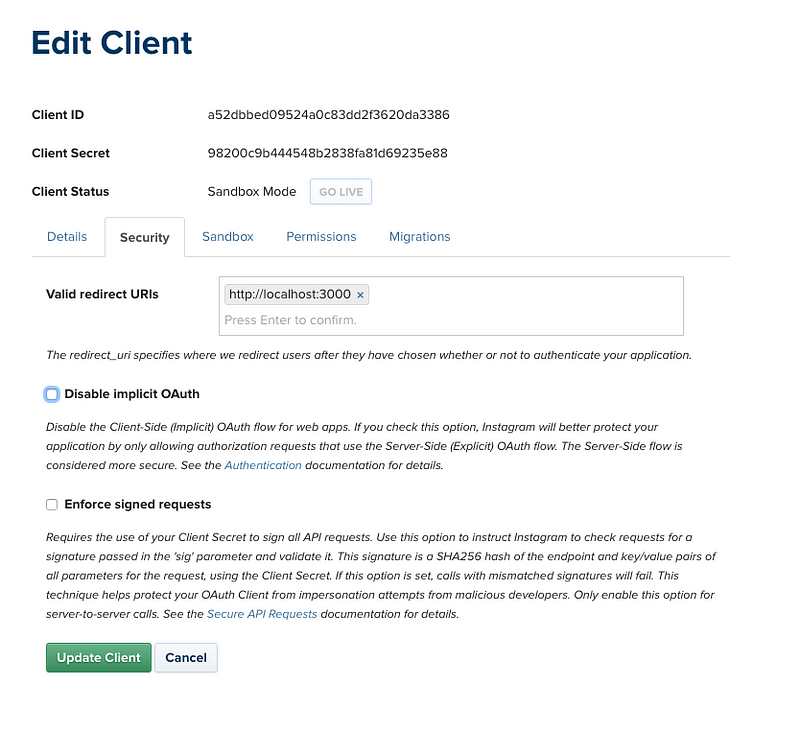
Click ‘Edit’ on your app from the Manage Clients screen, then open the ‘Security’ tab and uncheck the ‘Disable Implicit OAuth’ since we’d like the public to be able to see our feed.
Also, open the ‘Sandbox’ tab and confirm you are the ‘admin’ of this app.
If you are a developer and you want to showcase Instagram content on a website, then you do not need to submit your app for review. By using a client in sandbox mode, you will still be able to access the last 20 media of any sandbox user that grants you permission.
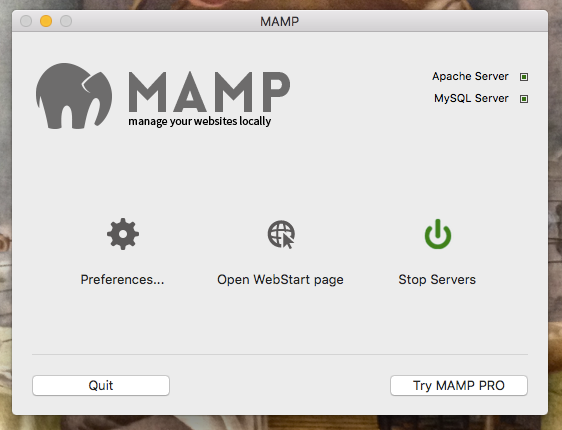
One big change to the API is that you have to use an ‘Access Token’ to access media now… this is likely what broke your feed. Spin up a localhost server for this step: You will need to run a local server to view your access token, so use your favorite MAMP, LAMP, Node whatever you use to create a local server. If you don’t use local servers, it’s super easy with MAMP to get up and running: mamp.info/en/downloads. For the purposes of this example I will use MAMP and point Apache to port 3000.
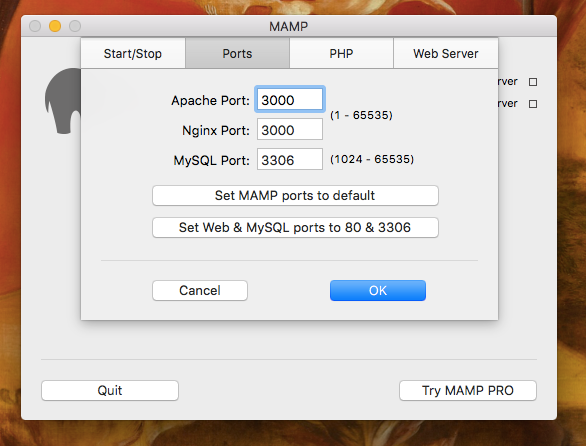
Once you have a ‘localhost’ server running, you can use a simple URL in your browser to grab your access token. Open your browser and paste the url below, replacing the string after ‘client_id’ and before the ’&’ with your Client ID you saved earlier, and hit Enter to visit this URL: https://www.instagram.com/oauth/authorize/?client_id=a52dbbed09524a0c83dd2f3620da3386&redirect_uri=http://localhost:3000&response_type=token&scope=public_content
Remember: Replace the ‘a52dbbed09524a0c83dd2f3620da3386’ part of this url with your Client ID. You can access the Client ID again from the Instagram Developers site on the Manage Clients page.
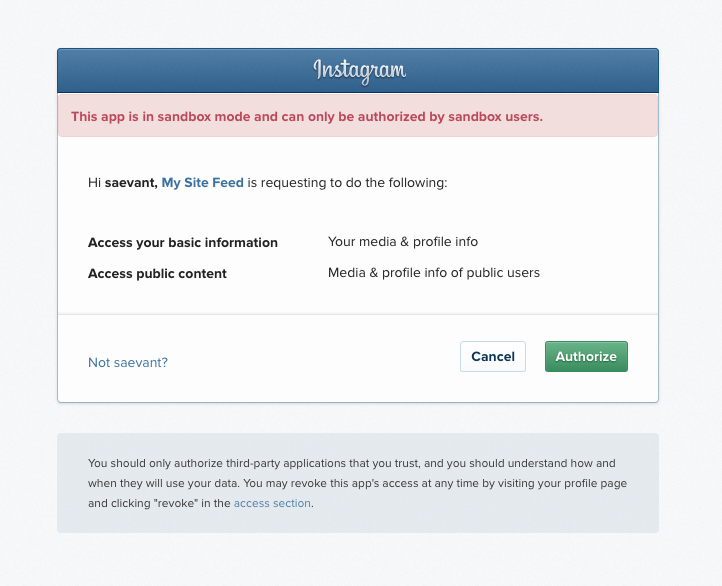
Visiting the URL we made with the Client ID will bring up an ‘Authorize’ screen. At this point, you are using your local server to simulate an API connection, and you will Authorize it to get a view of the Access Token response. Click ‘Authorize’.
This page appears broken, but it has a critical bit of data in the URL… right after ‘#access_token=’ you can grab your public Access Token, which also has your ID in it. According to this response, the access token is: 1915084522.a52dbbe.76ef404eec5045e0ab349f864efe1751
Here is a quick snippet to give you an idea of how you can use the access token:
var Spectra = {
  instaToken: '2136707.4dd19c1.d077b227b0474d80a5665236d2e90fcf',
  instaID: ' 4dd19c1f5c7745a2bca7b4b3524124d0',

  init: function () {
    $.fn.spectragram.accessData = {
      accessToken: this.instaToken,
      clientID: this.instaID
    };

    $('.feed').spectragram('getUserFeed',{
      max: 12,
      query: 'adrianengine',
      wrapEachWith: '<div class="photo">'
    });
  }
}

Spectra.init();

